
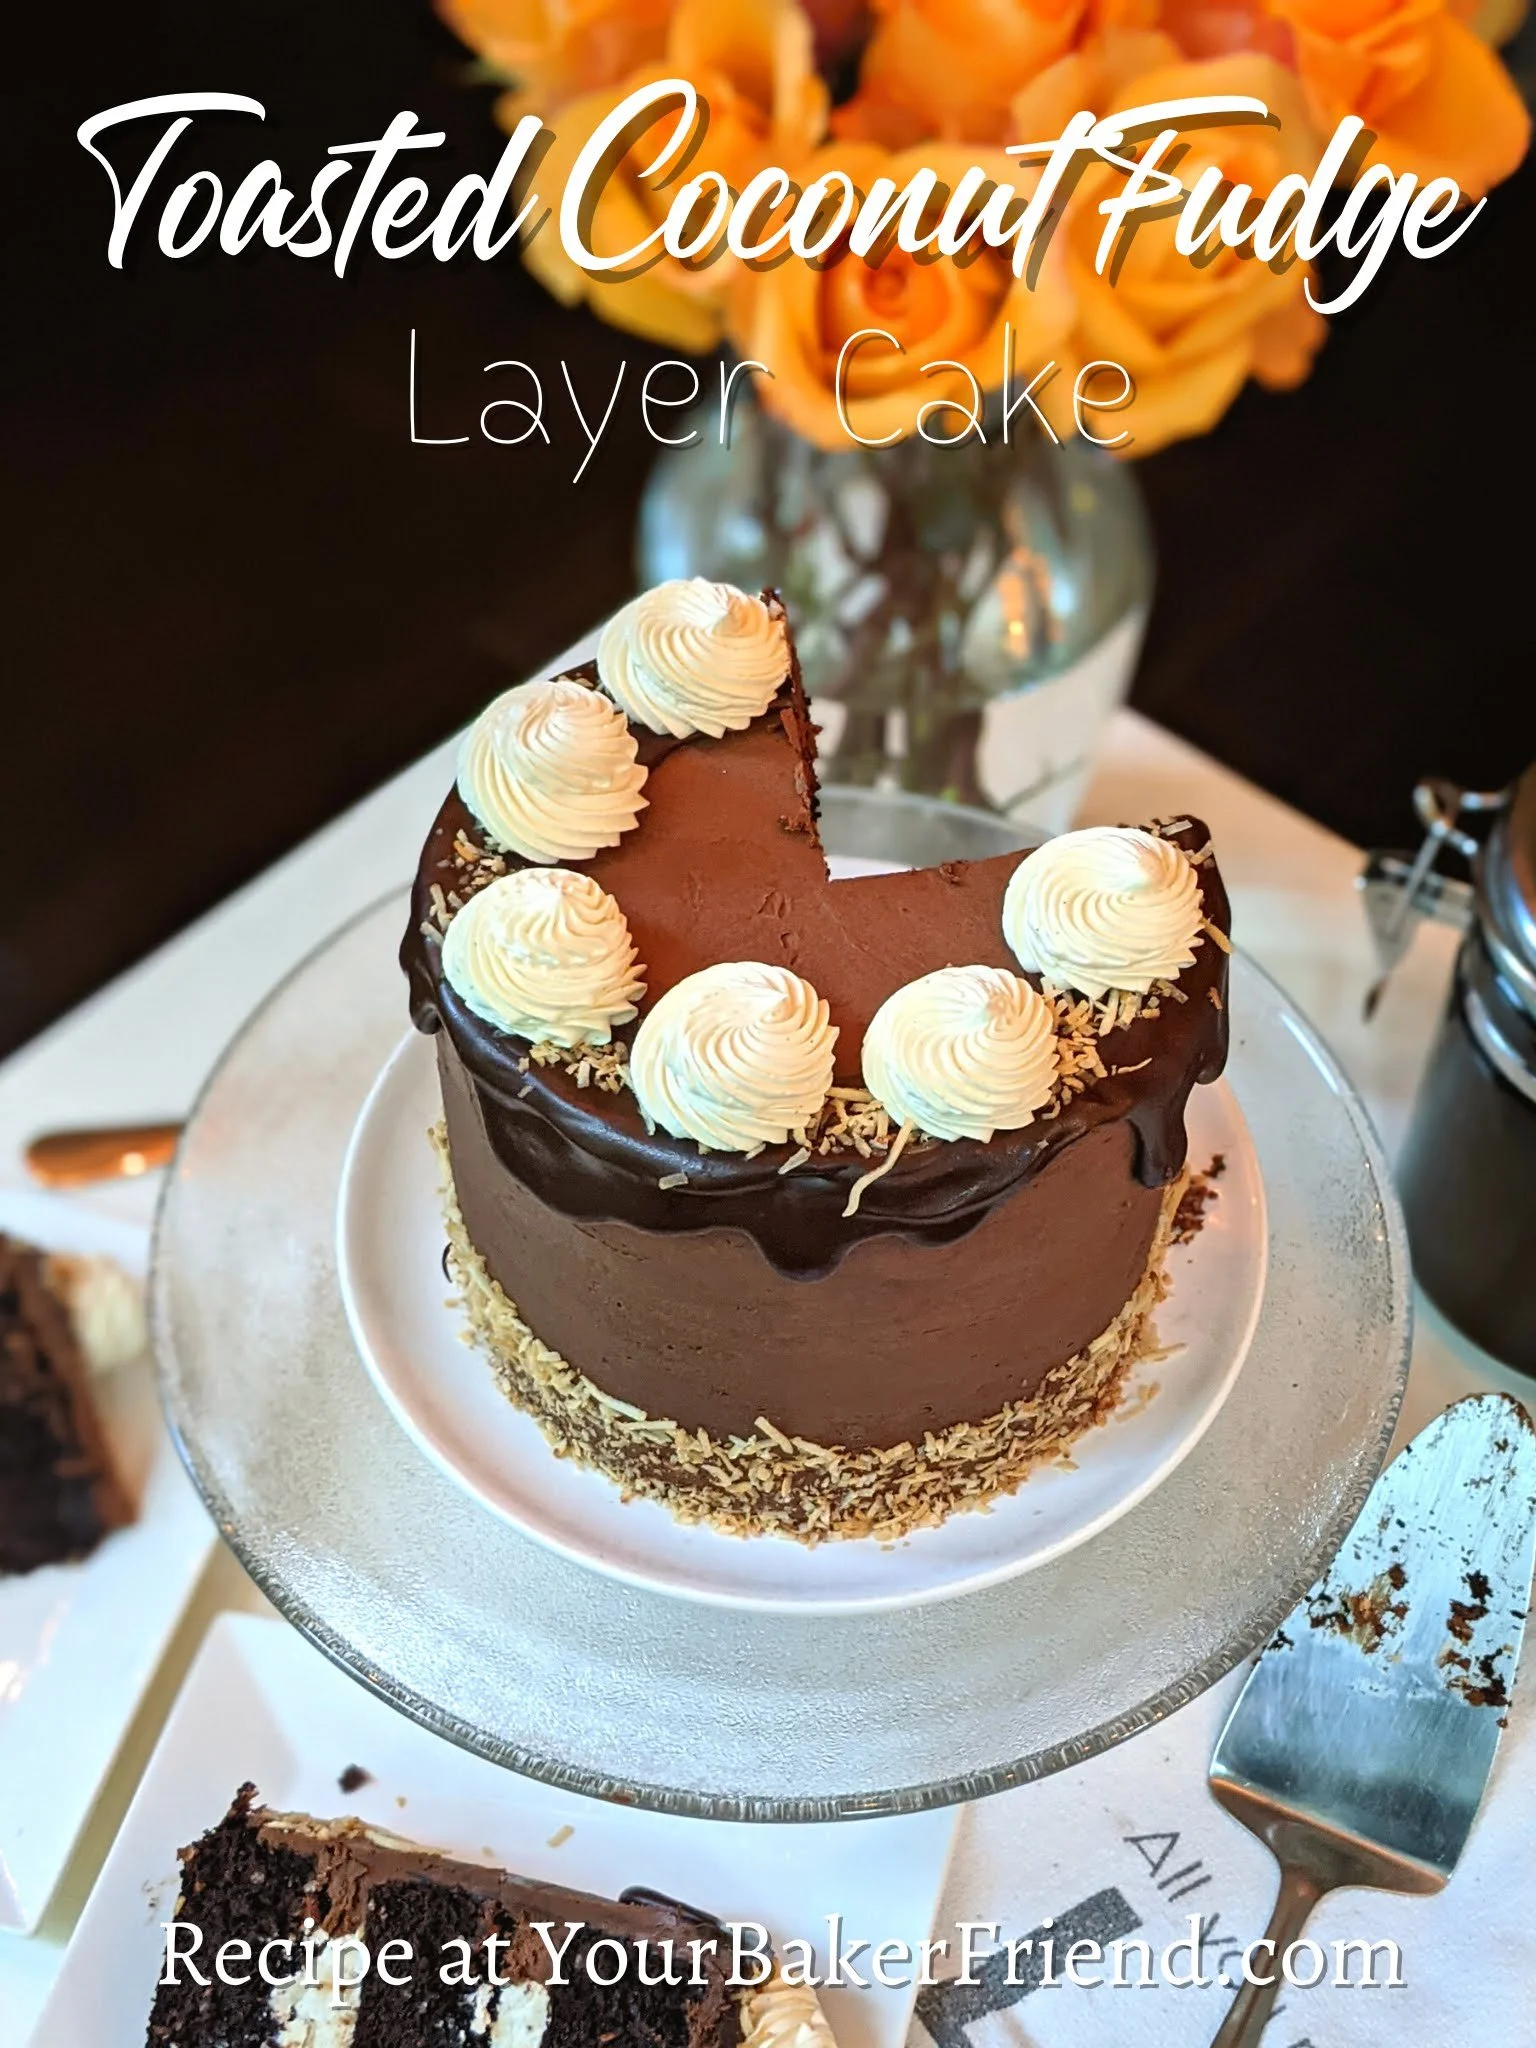
Toasted Coconut Fudge Layer Cake
To skip the post and step-by-step instructions and go straight to recipe, click here.While many of my recipes are inspired by requests from friends or followers, this is one that I made for one simple reason - I wanted to eat it!! Chocolate and coconut are two of my favorite flavors in the world. And combined into a soft, luscious layer cake? Well, that’s my perfect dessert right there. Layers of soft, moist dark chocolate cake studded with toasted coconut, filled with a fluffy cream filling and more toasty coconut, and coated in rich whipped ganache. It’s heaven on a plate.
Recipe Notes
3 Layer vs. 2 Layer: In this recipe, instructions are included for both a 6-inch 3 layer cake, and an 8-inch 2 layer cake. There are pros and cons to each, but it’s up to you which to make depending on your needs.
3 layer: I usually prefer to make a 3 layer cake for two main reasons. The first is, of course, more filling! That creamy buttercream filling is so fluffy and sweet, and I think two layers of it is the perfect amount to provide contrast to the dark chocolate cakes. Also, I think that cakes that are taller and slimmer are nicer for decorating. I personally like to have more real estate on the sides of a cake than the top of it for decorating, but that’s entirely my personal preference. The con of making a three layer cake however, is that they’re slightly more unstable when building and frosting. If you’re a beginner at making layer cakes, I would stick to a 2 layer cake for a greater chance of a tidy end result.
2 layer: A 2 layer cake is a great option if you don’t have too much experience stacking and frosting layer cakes. If your cake is for an occasion and you want to write on top, this provides you with more surface area for writing as well. Also, 2 layer cakes are easier to cut into neat slices, as the slices will be more wide and short rather than tall and thin.
Ingredient substitutions: A few of the ingredients in the main cake can be switched out if you don’t have them on hand. If you don’t have coffee (or don’t like it), you can certainly use hot water. The main reason for the coffee is simply to enhance the flavor of the dark cocoa. Also, if you don’t have sour cream on hand, you can substitute buttermilk or yogurt for a slightly less rich but perfectly tasty cake.
On toasting coconut: When toasting the coconut, make sure not to leave it unattended in the oven for more than 2 minutes without checking it. Coconut browns very quickly! You’ll be looking for a mixture of 3 colors in your finished toasted coconut - golden brown, pale golden, and cream.
Flavor Variations: If coconut isn’t your favorite, this recipe is also great for just a chocolate cake with another added ingredient. Take a look at the suggestions below to find your favorite!
Nutty Fudge Cake: Replace the toasted coconut with toasted chopped nuts of your choice and the coconut extract with hazelnut or almond extract. Use pecans and add a drizzle of caramel ice cream topping between the cake layers to make a turtle version!
Raspberry Fudge Cake: Replace the toasted coconut with crushed freeze-dried raspberries and the coconut extract with raspberry or almond extract.
Peanut Butter Fudge Cake: Replace toasted coconut with chopped salted peanuts, remove coconut extract, and add ¼ cup creamy peanut butter to the vanilla cream filling.
Cookies and Cream Fudge Cake: Replace toasted coconut with roughly chopped chocolate sandwich cookies (get creative and use your favorite flavor!), and replace the coconut extract with vanilla.
Double Chocolate Chip Fudge Cake: Replace toasted coconut with mini chocolate chips and replace coconut extract with vanilla.
Other Helpful Tips For Layer Cakes:
On lining cake tins: I like to really make sure that I make it as easy as possible for my cakes to get out of the tins. No one likes a cake that gets stuck in the pan! A circle of parchment on the bottom of your pan is the most surefire way to make sure your cake tips straight out. I also always grease the sides of my pan, and I usually flour them as well. For chocolate cakes specifically however (like this one), I dust the greased sides with cocoa powder. Otherwise, the edges of your chocolate cake will have a floury white residue on them. This way, your cake stays chocolatey all the way!
On sugar syrups: If you’ve never used a sugar syrup to moisten a cake before, it may seem a little strange. But many professional bakeries use this method to make cakes that are perfectly moist and stay that way! Once I started using the sugar syrup method, I never went back. It’s also a great way to introduce more flavor to your cake layers.
On stacking cakes: If you haven’t done much stacking of cakes, here are some tips for a more successful finished product.
When putting the fillings between the layers of cakes, first pipe a border of the outside frosting around the edge of the cake and then fill it in with the filling. This will keep the filling from squishing out and mixing with your outside frosting.
Always do a crumb coat. This is an initial layer of frosting that’s scraped very thin. It has two purposes: Firstly, it seals in any loose crumbs and prevents them from getting to the outside of the frosting, resulting in a more even finish. Secondly, it allows you to fill in any lopsidedness of your cake with frosting and get smoother, sharper edges. If your cake is shorter on one side for example, just do a slightly thicker crumb coat on that section to even it out. Just don’t forget to refrigerate the crumb coat before adding the next layer of frosting (see next note).
The fridge and freezer are your best friends when stacking cakes. The main ingredient in most frostings and fillings is fat, which hardens up when cold. If your cake is slipping, or your layers are melding together, or something just isn’t working out, toss it in the freezer for 15 minutes and come back to it. A cake is incredibly easier to frost and decorate if it’s stiff and cold. Always cool your cake down between steps, too - once your cake is stacked and crumb coated, pop it in the fridge or freezer before adding the next layer of frosting. This will ensure that your crumb coat serves its purpose correctly and doesn’t meld into your main frosting layer.

Step-By-Step Walk-Through
If you’re feeling confident in your cooking skills and want to skip the walk-through, click here.
Step 1:
Toast Coconut

Preheat oven to 350 degrees fahrenheit.
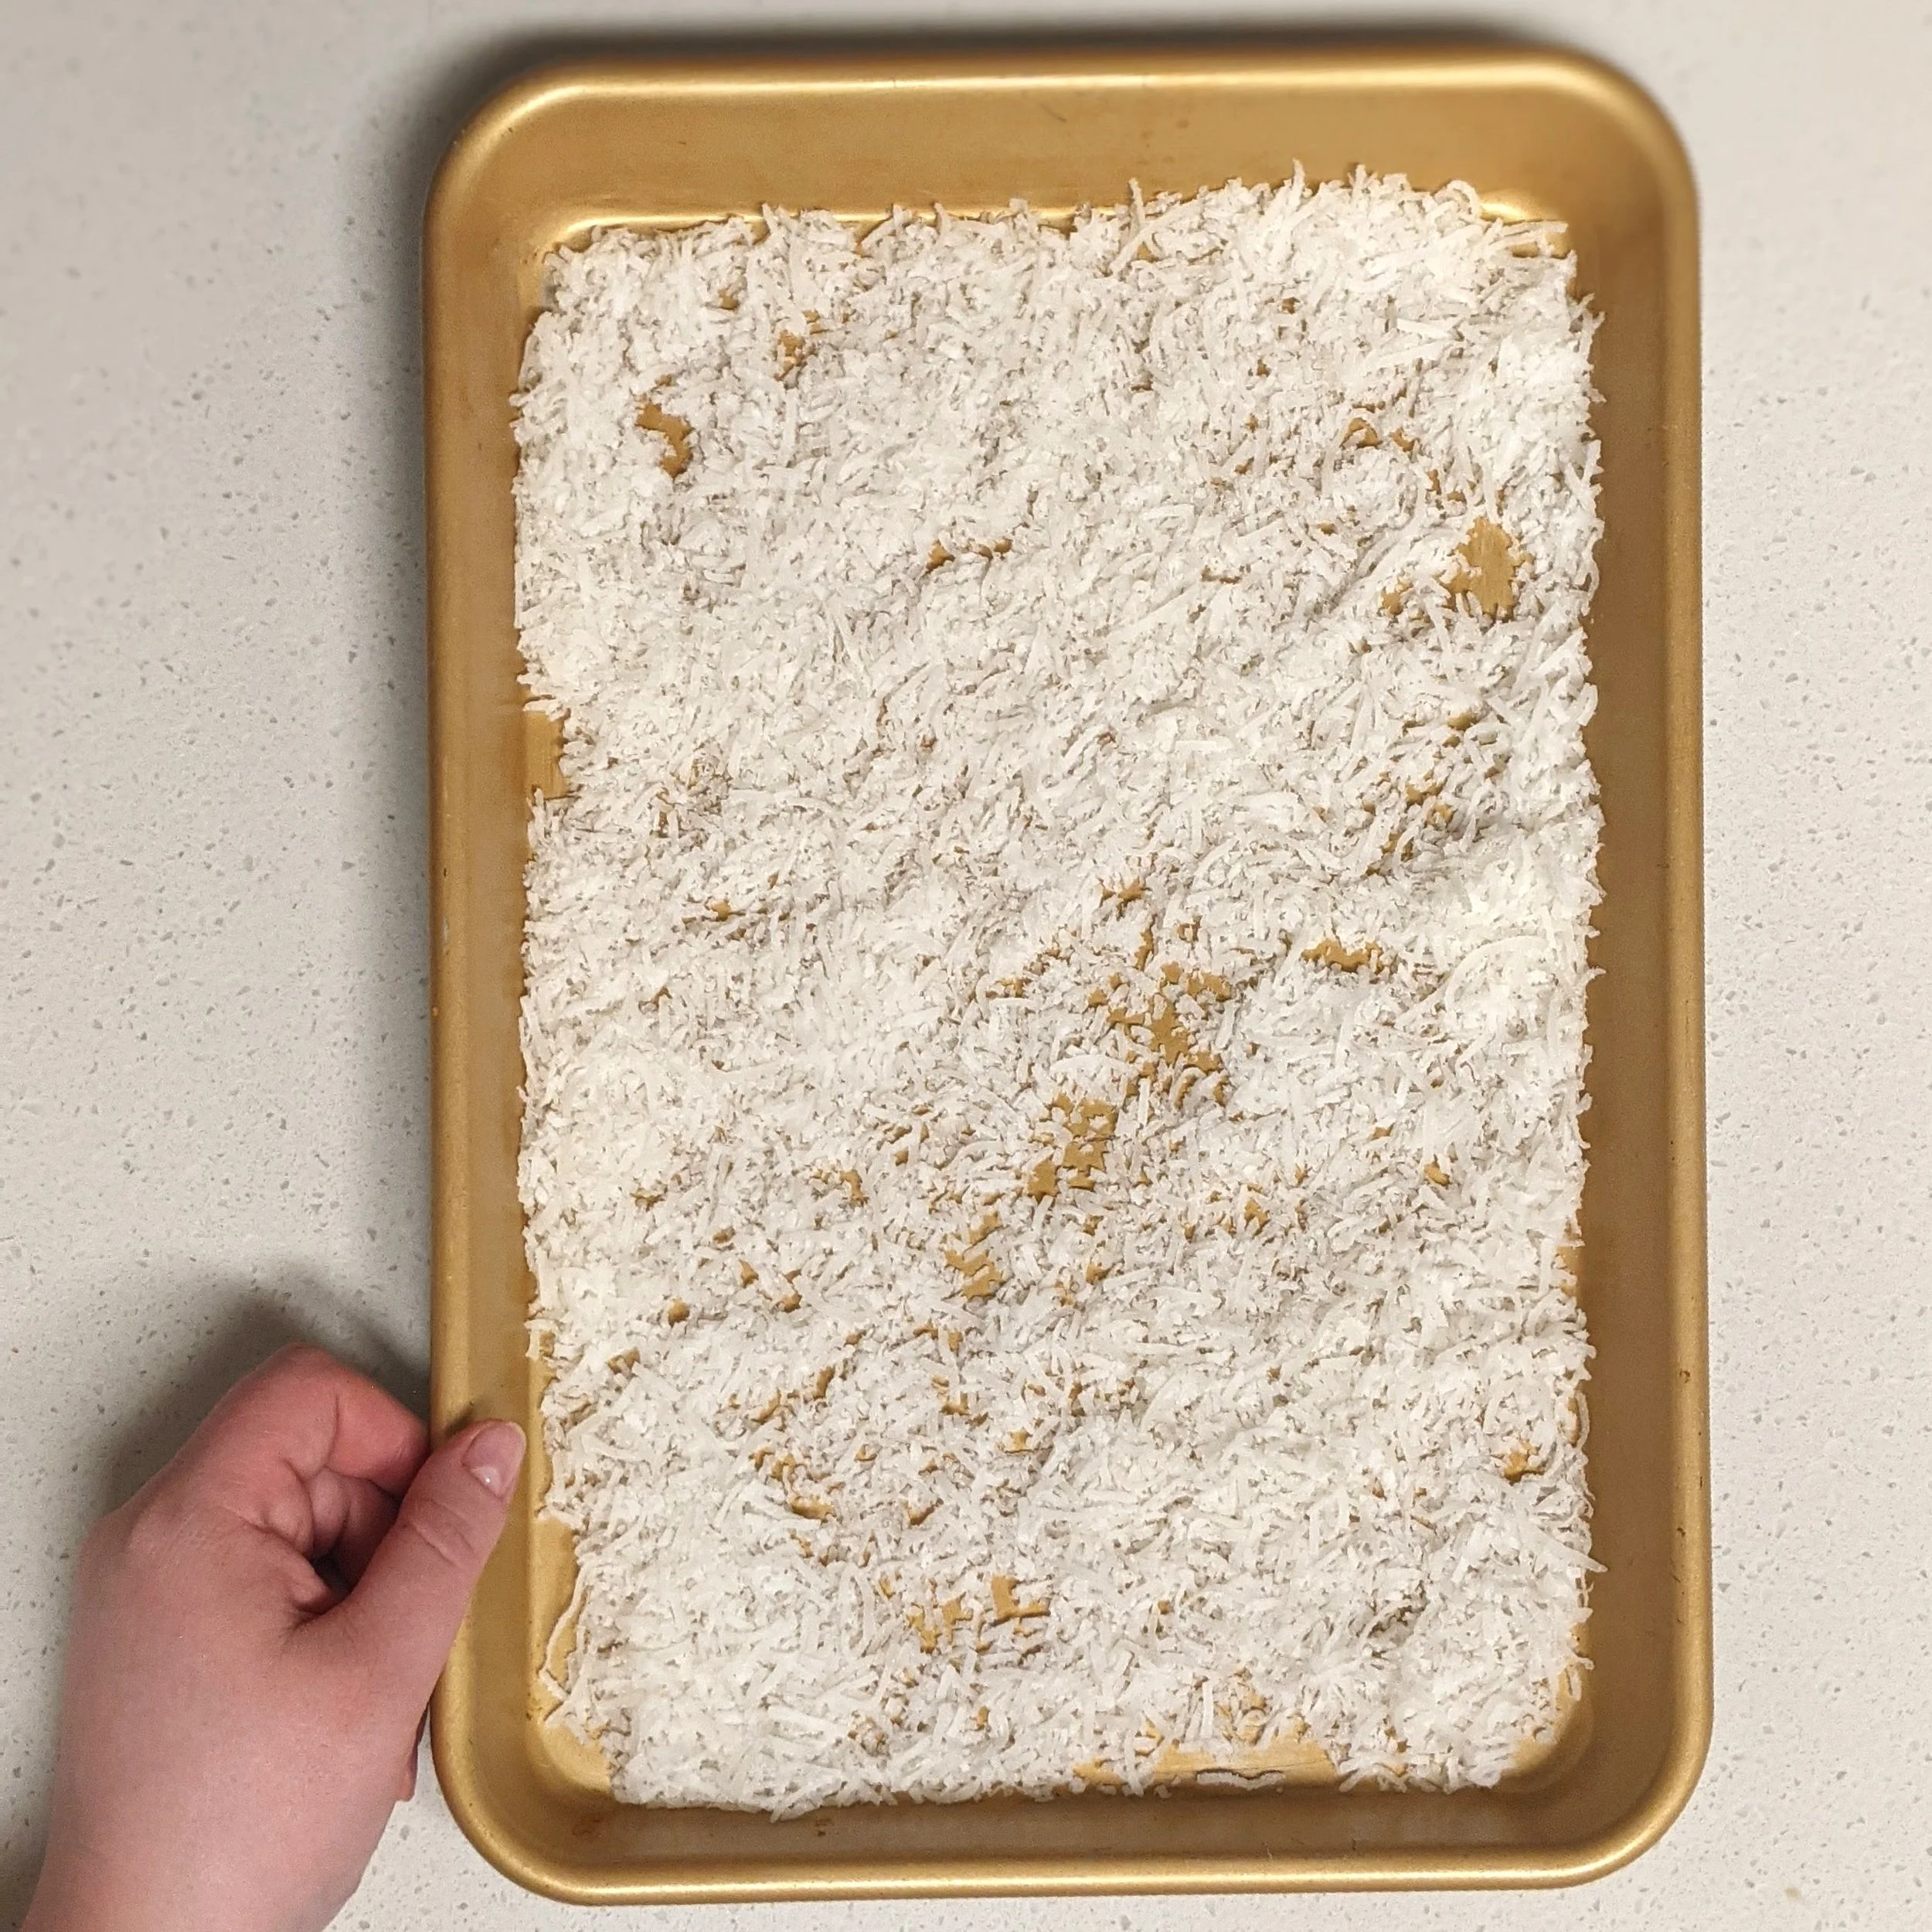
Spread 1 cup of sweetened shredded coconut on a sheet pan in an even layer.

Toast coconut in preheated oven for 2 minutes. Remove and stir.
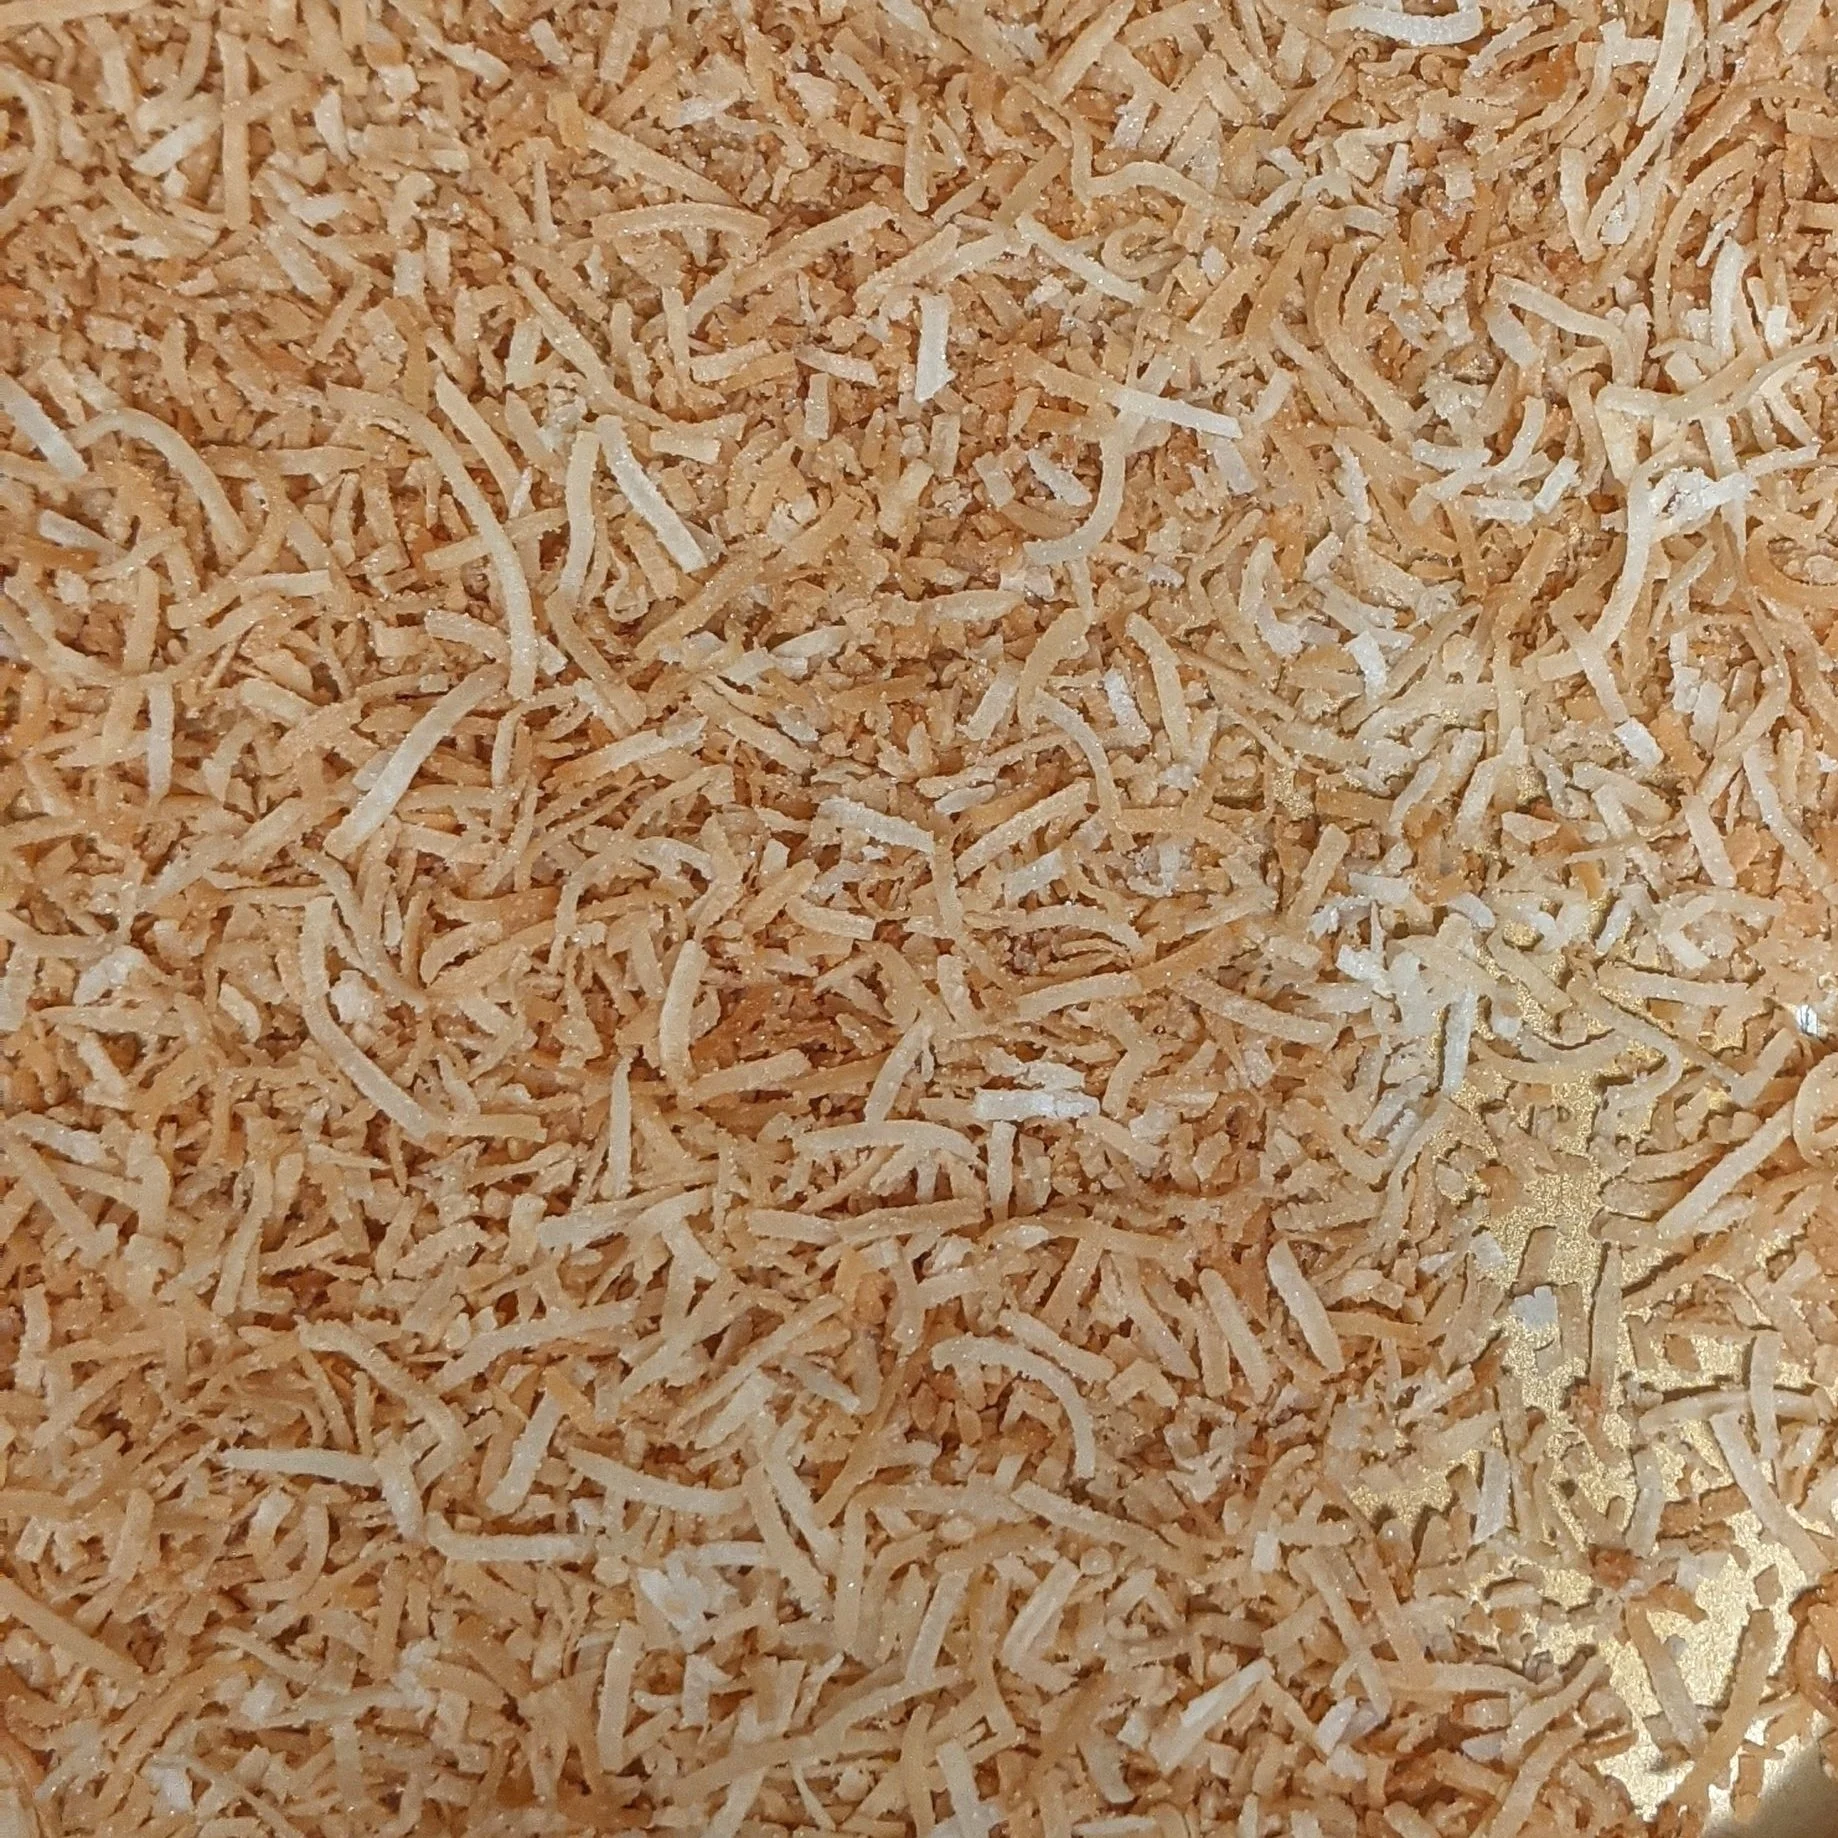
Toast for another 2 minutes, then remove from oven. You should be seeing three colors of coconut - golden brown, light golden, and cream. If you’re not yet seeing golden brown, stir again and continue toasting in 2 minute intervals until ready.
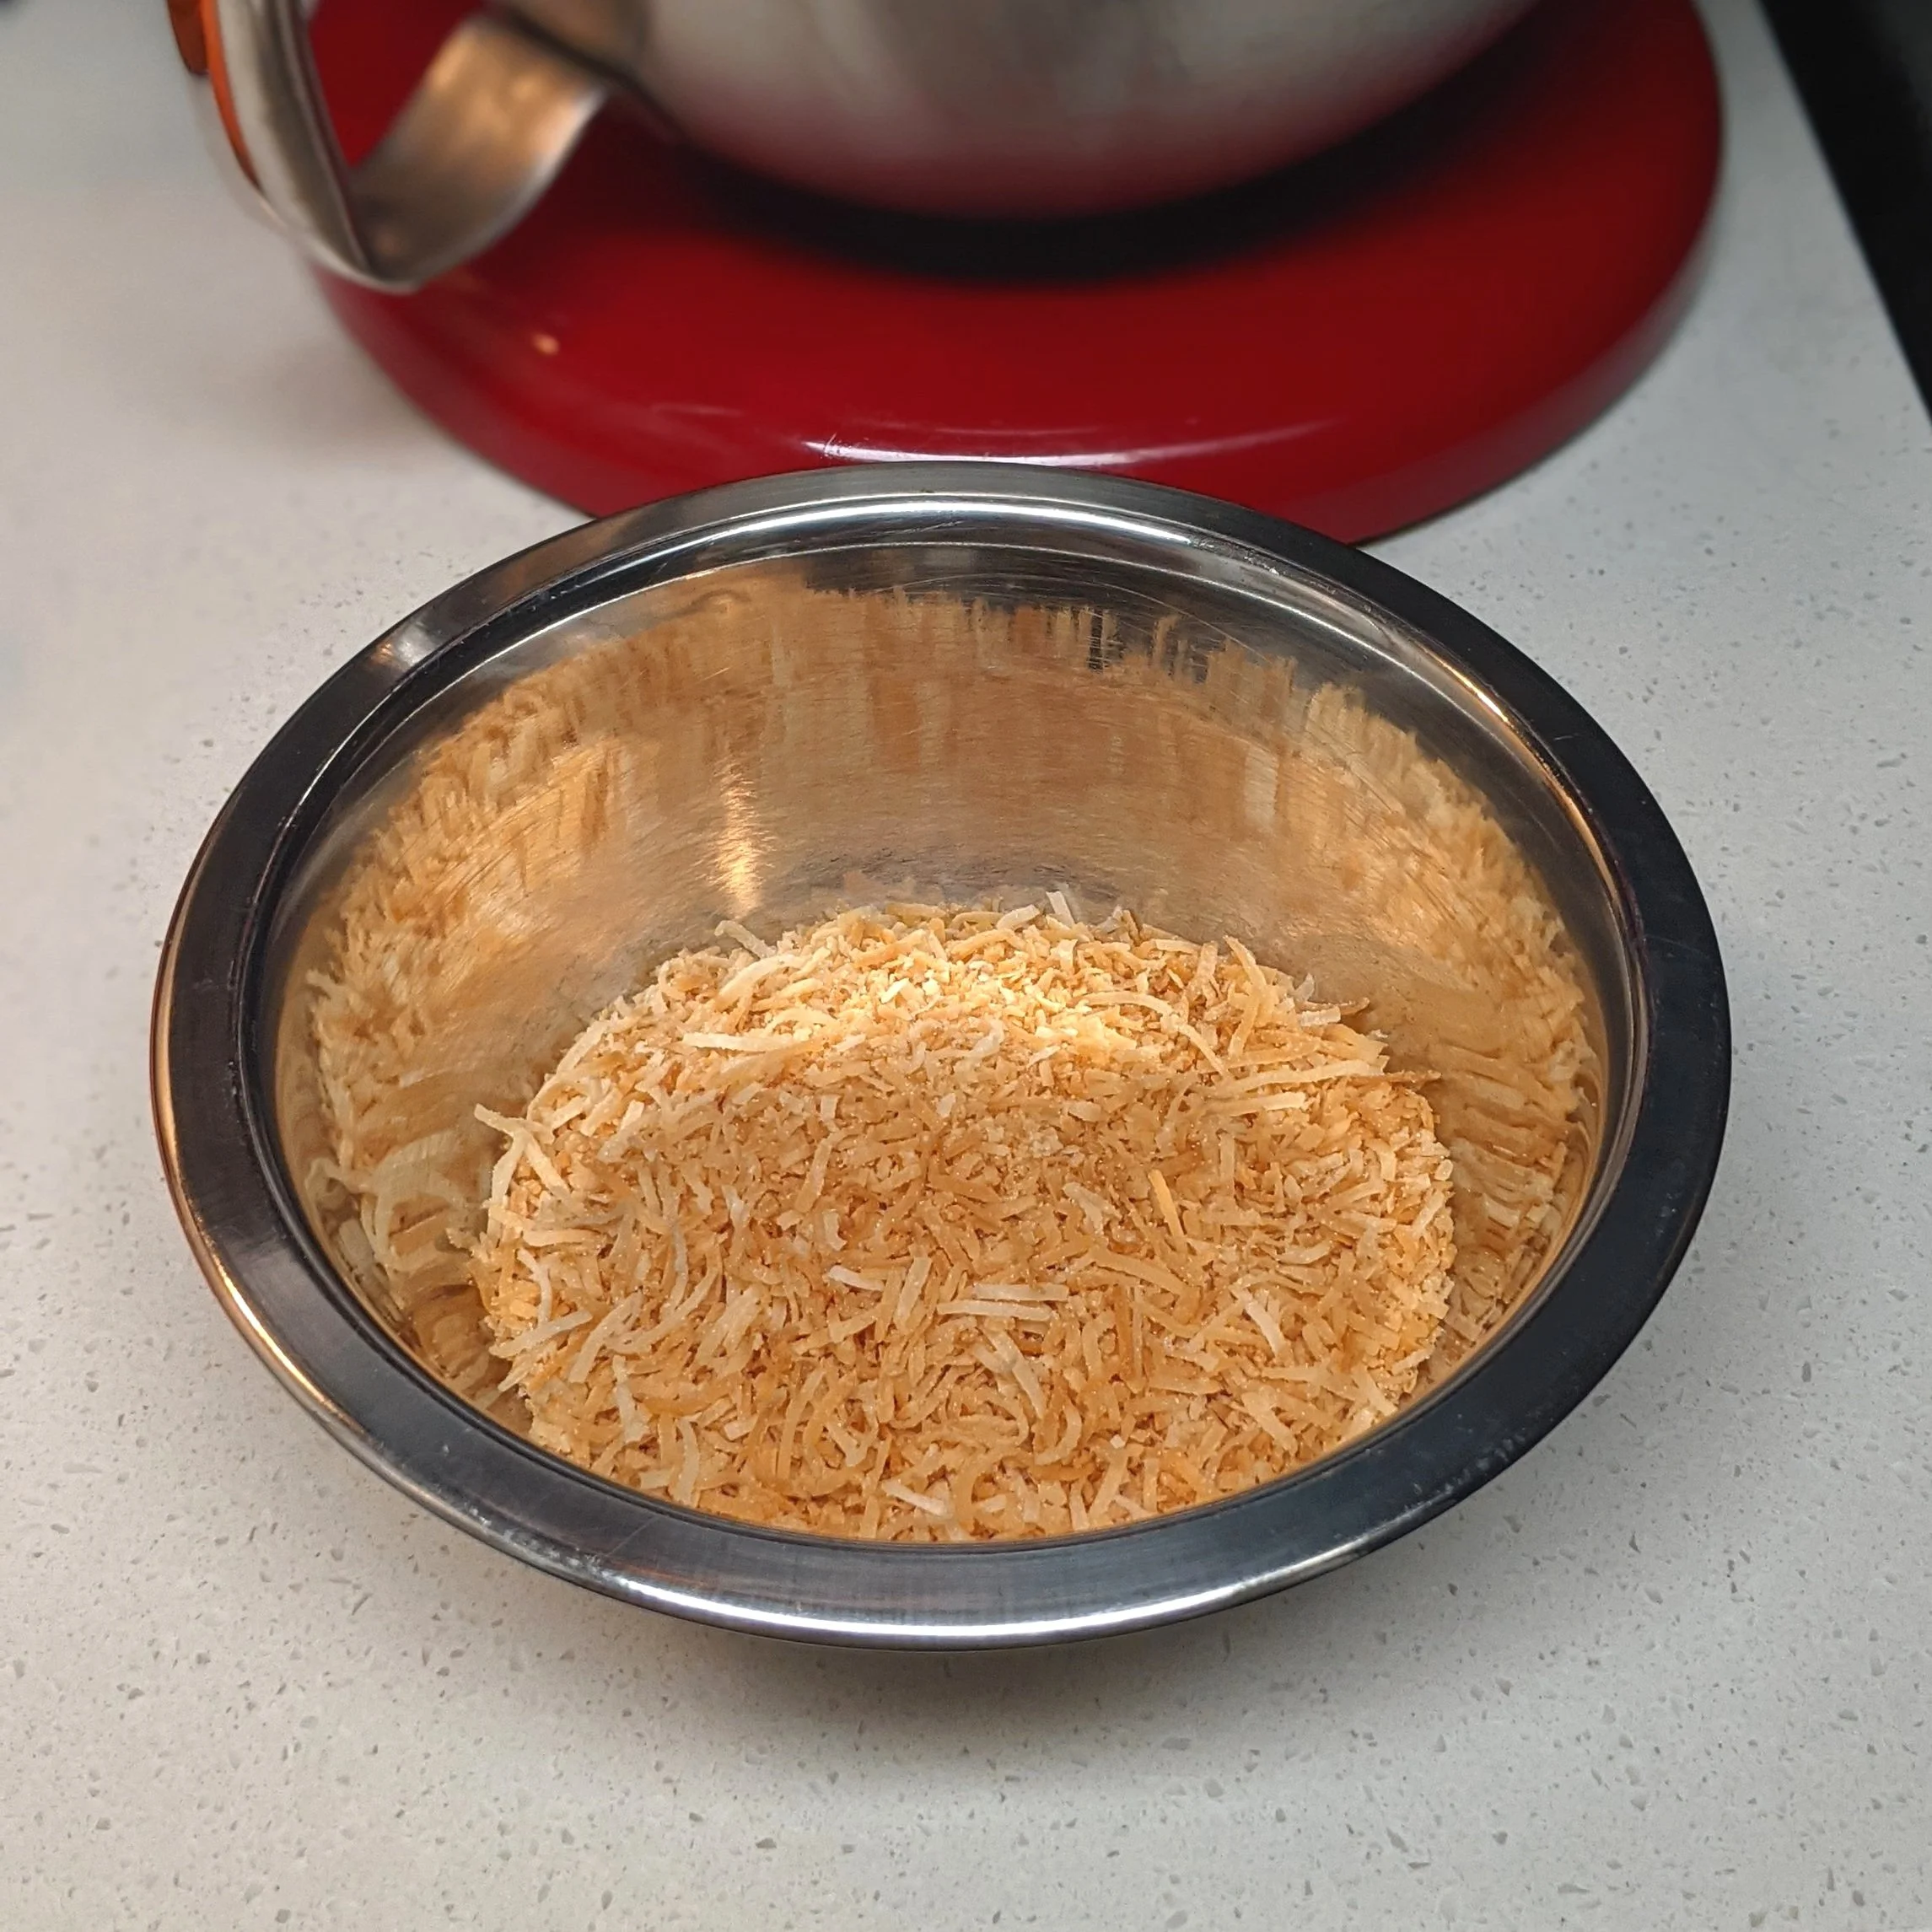
Once proper levels of toastiness are achieved, remove the coconut from the pan and set it aside. Leave the oven on for the cake.
Step 2:
Make Sugar Syrup
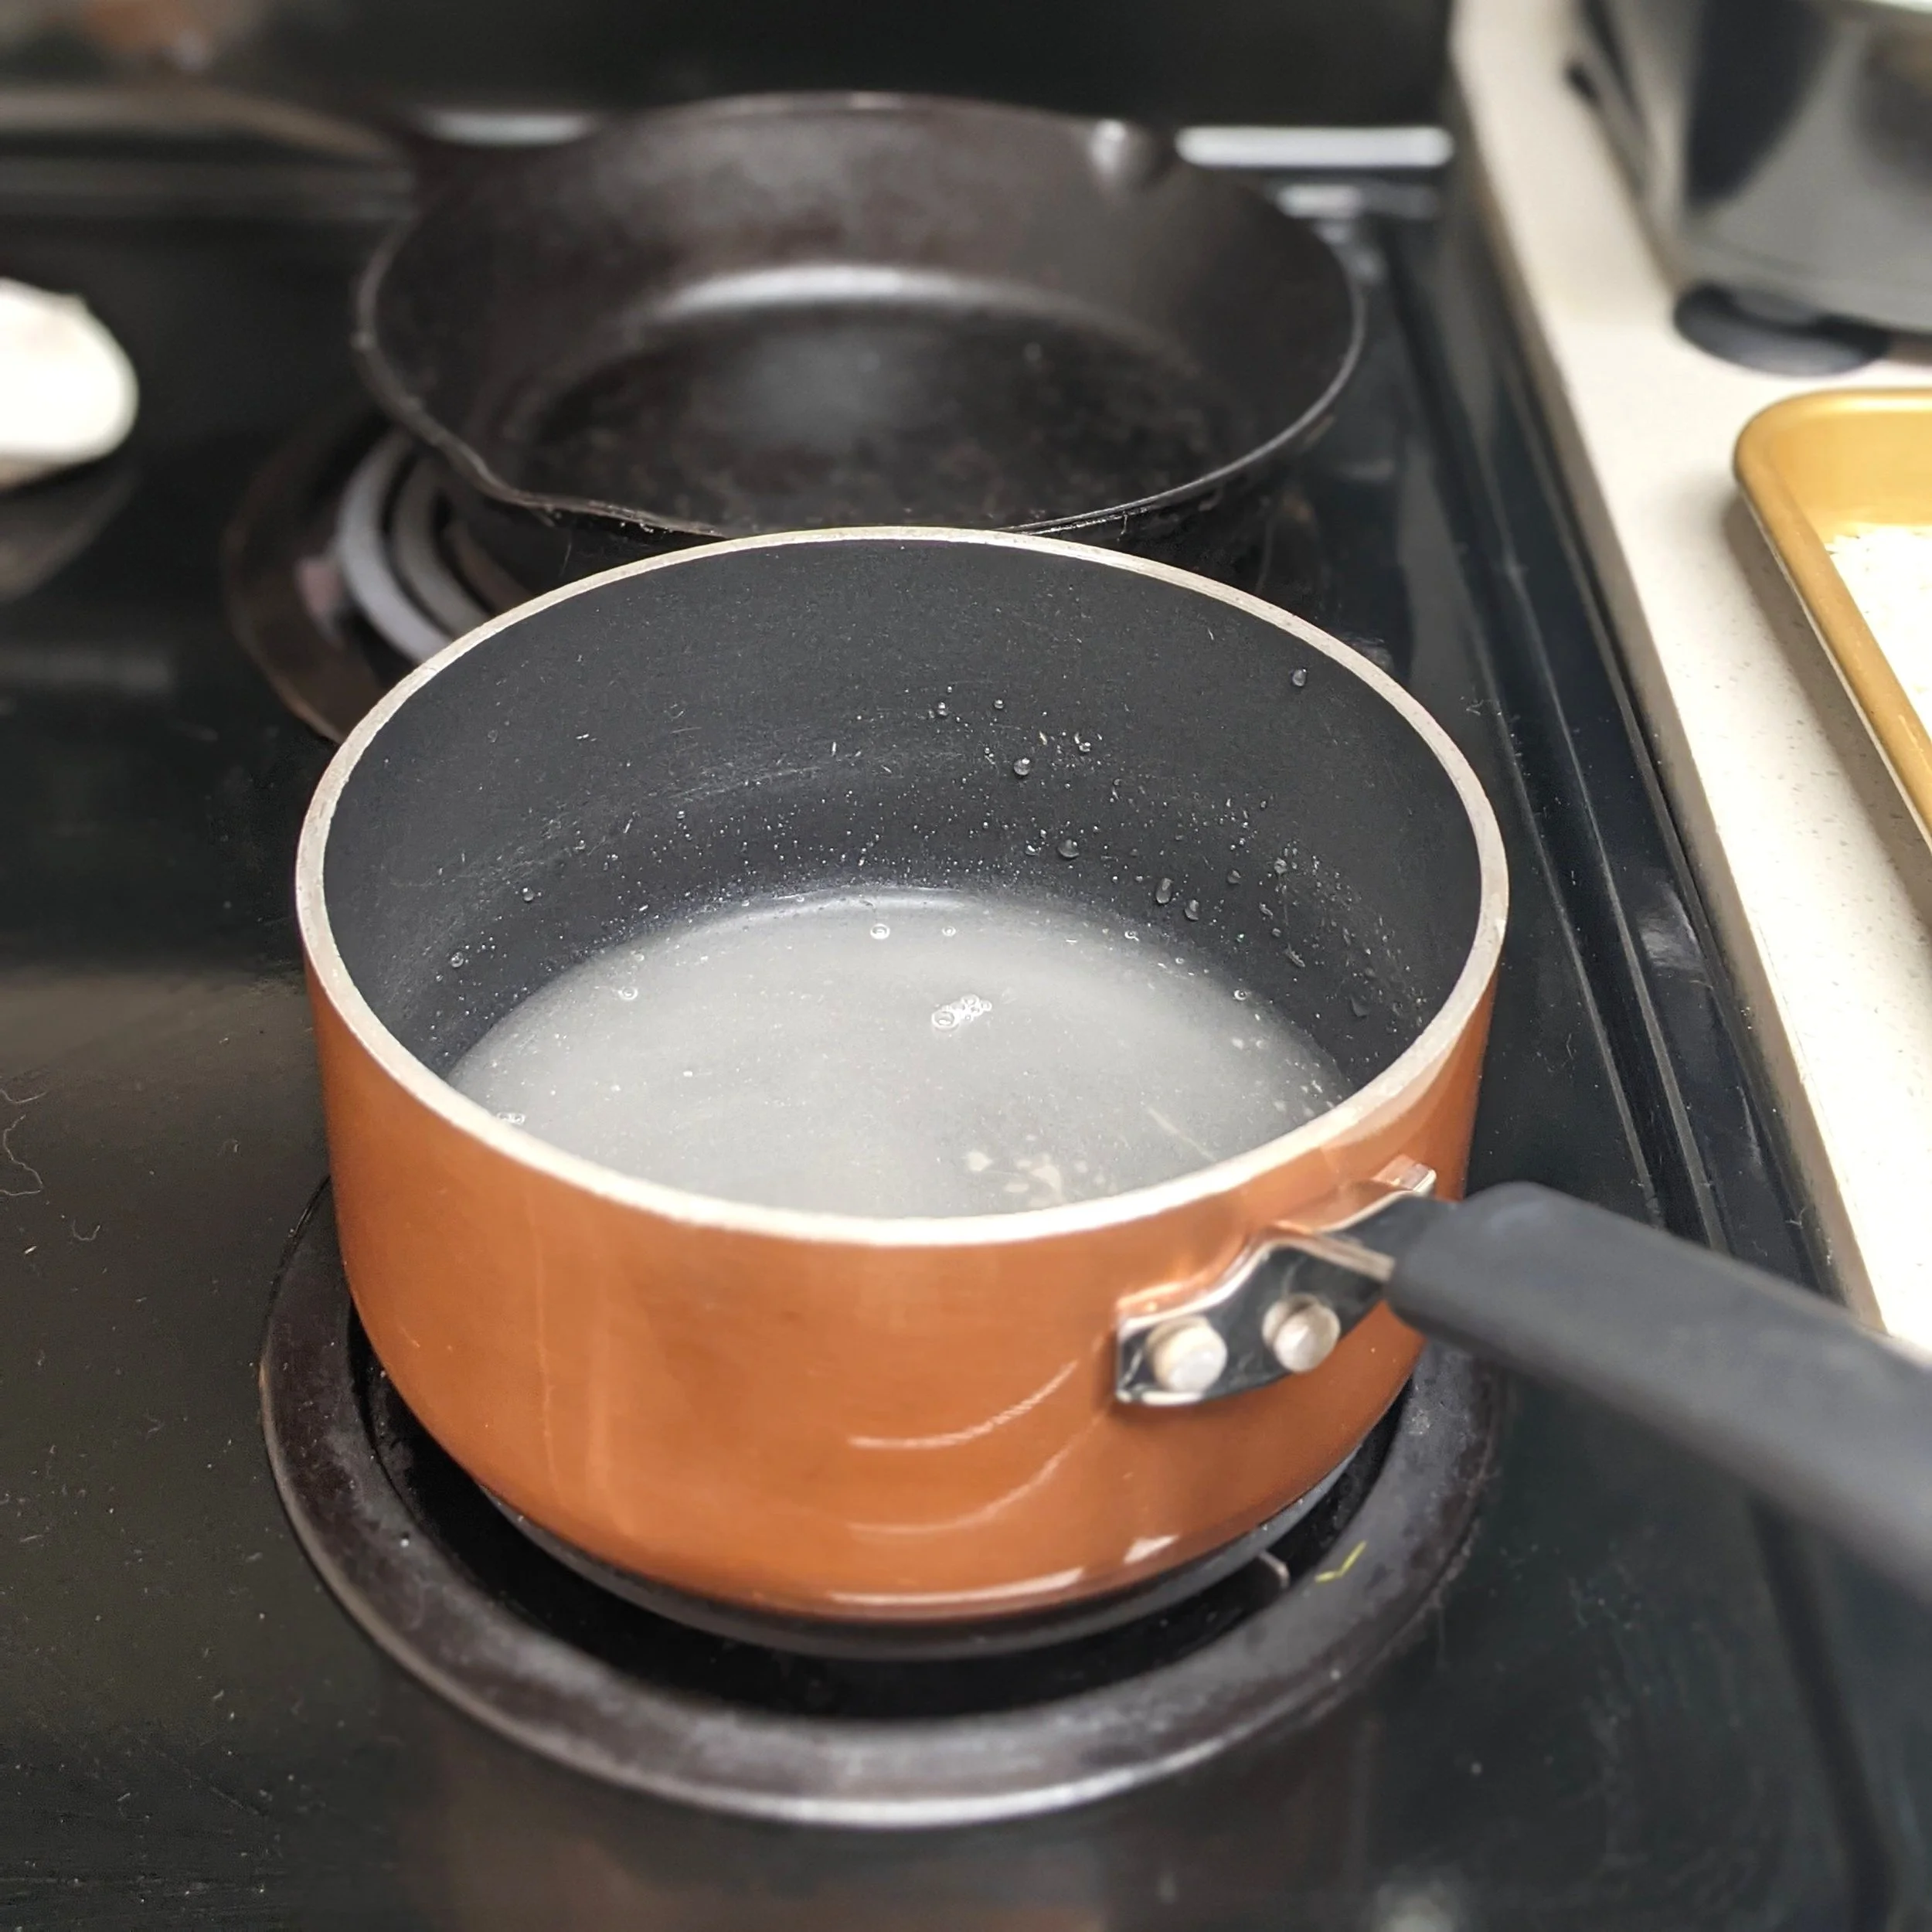
In a small saucepan, combine ⅓ cup of granulated sugar, ⅓ cup of water, and ¾ teaspoon coconut extract.

Place over medium heat and bring to a boil, stirring occasionally to dissolve sugar.
Once boiling, decrease heat to low and simmer for 5-10 minutes until slightly thickened to a thin syrup.

Pour into a heat-proof container and refrigerate until ready to use.
Step 3:
Bake Cake

Butter the inner sides and the edges of the bottoms of either 2 8-inch cake pans or 3 6-inch cake pans.

Dust the buttered areas with a thin coating of cocoa powder. Turn pans upside down and tap firmly on the bottom to knock off excess cocoa.

Line the bottoms of the cake pans with circles of parchment paper and set them aside.

Into a large mixing bowl, sift 1 ½ cups of all-purpose flour, ¾ cup of dark or black cocoa powder, 1 ½ cups of granulated sugar, 1 ½ teaspoons baking soda, ¾ teaspoon of baking powder, and 1 teaspoon of salt.

To the dry ingredients, add 2 eggs, ¾ cup of sour cream, 3 tablespoons of melted coconut oil, and 1 teaspoon of coconut extract.

Beat on medium speed with an electric mixer until smooth, 1 or 2 minutes. It will be quite thick, so use a spoon to hand-mix if your mixer isn't up to the job.

Add ¾ cup of hot coffee.
Beat until smooth again.

Fold in ⅓ cup of the toasted coconut.

Pour batter evenly into prepared pans.
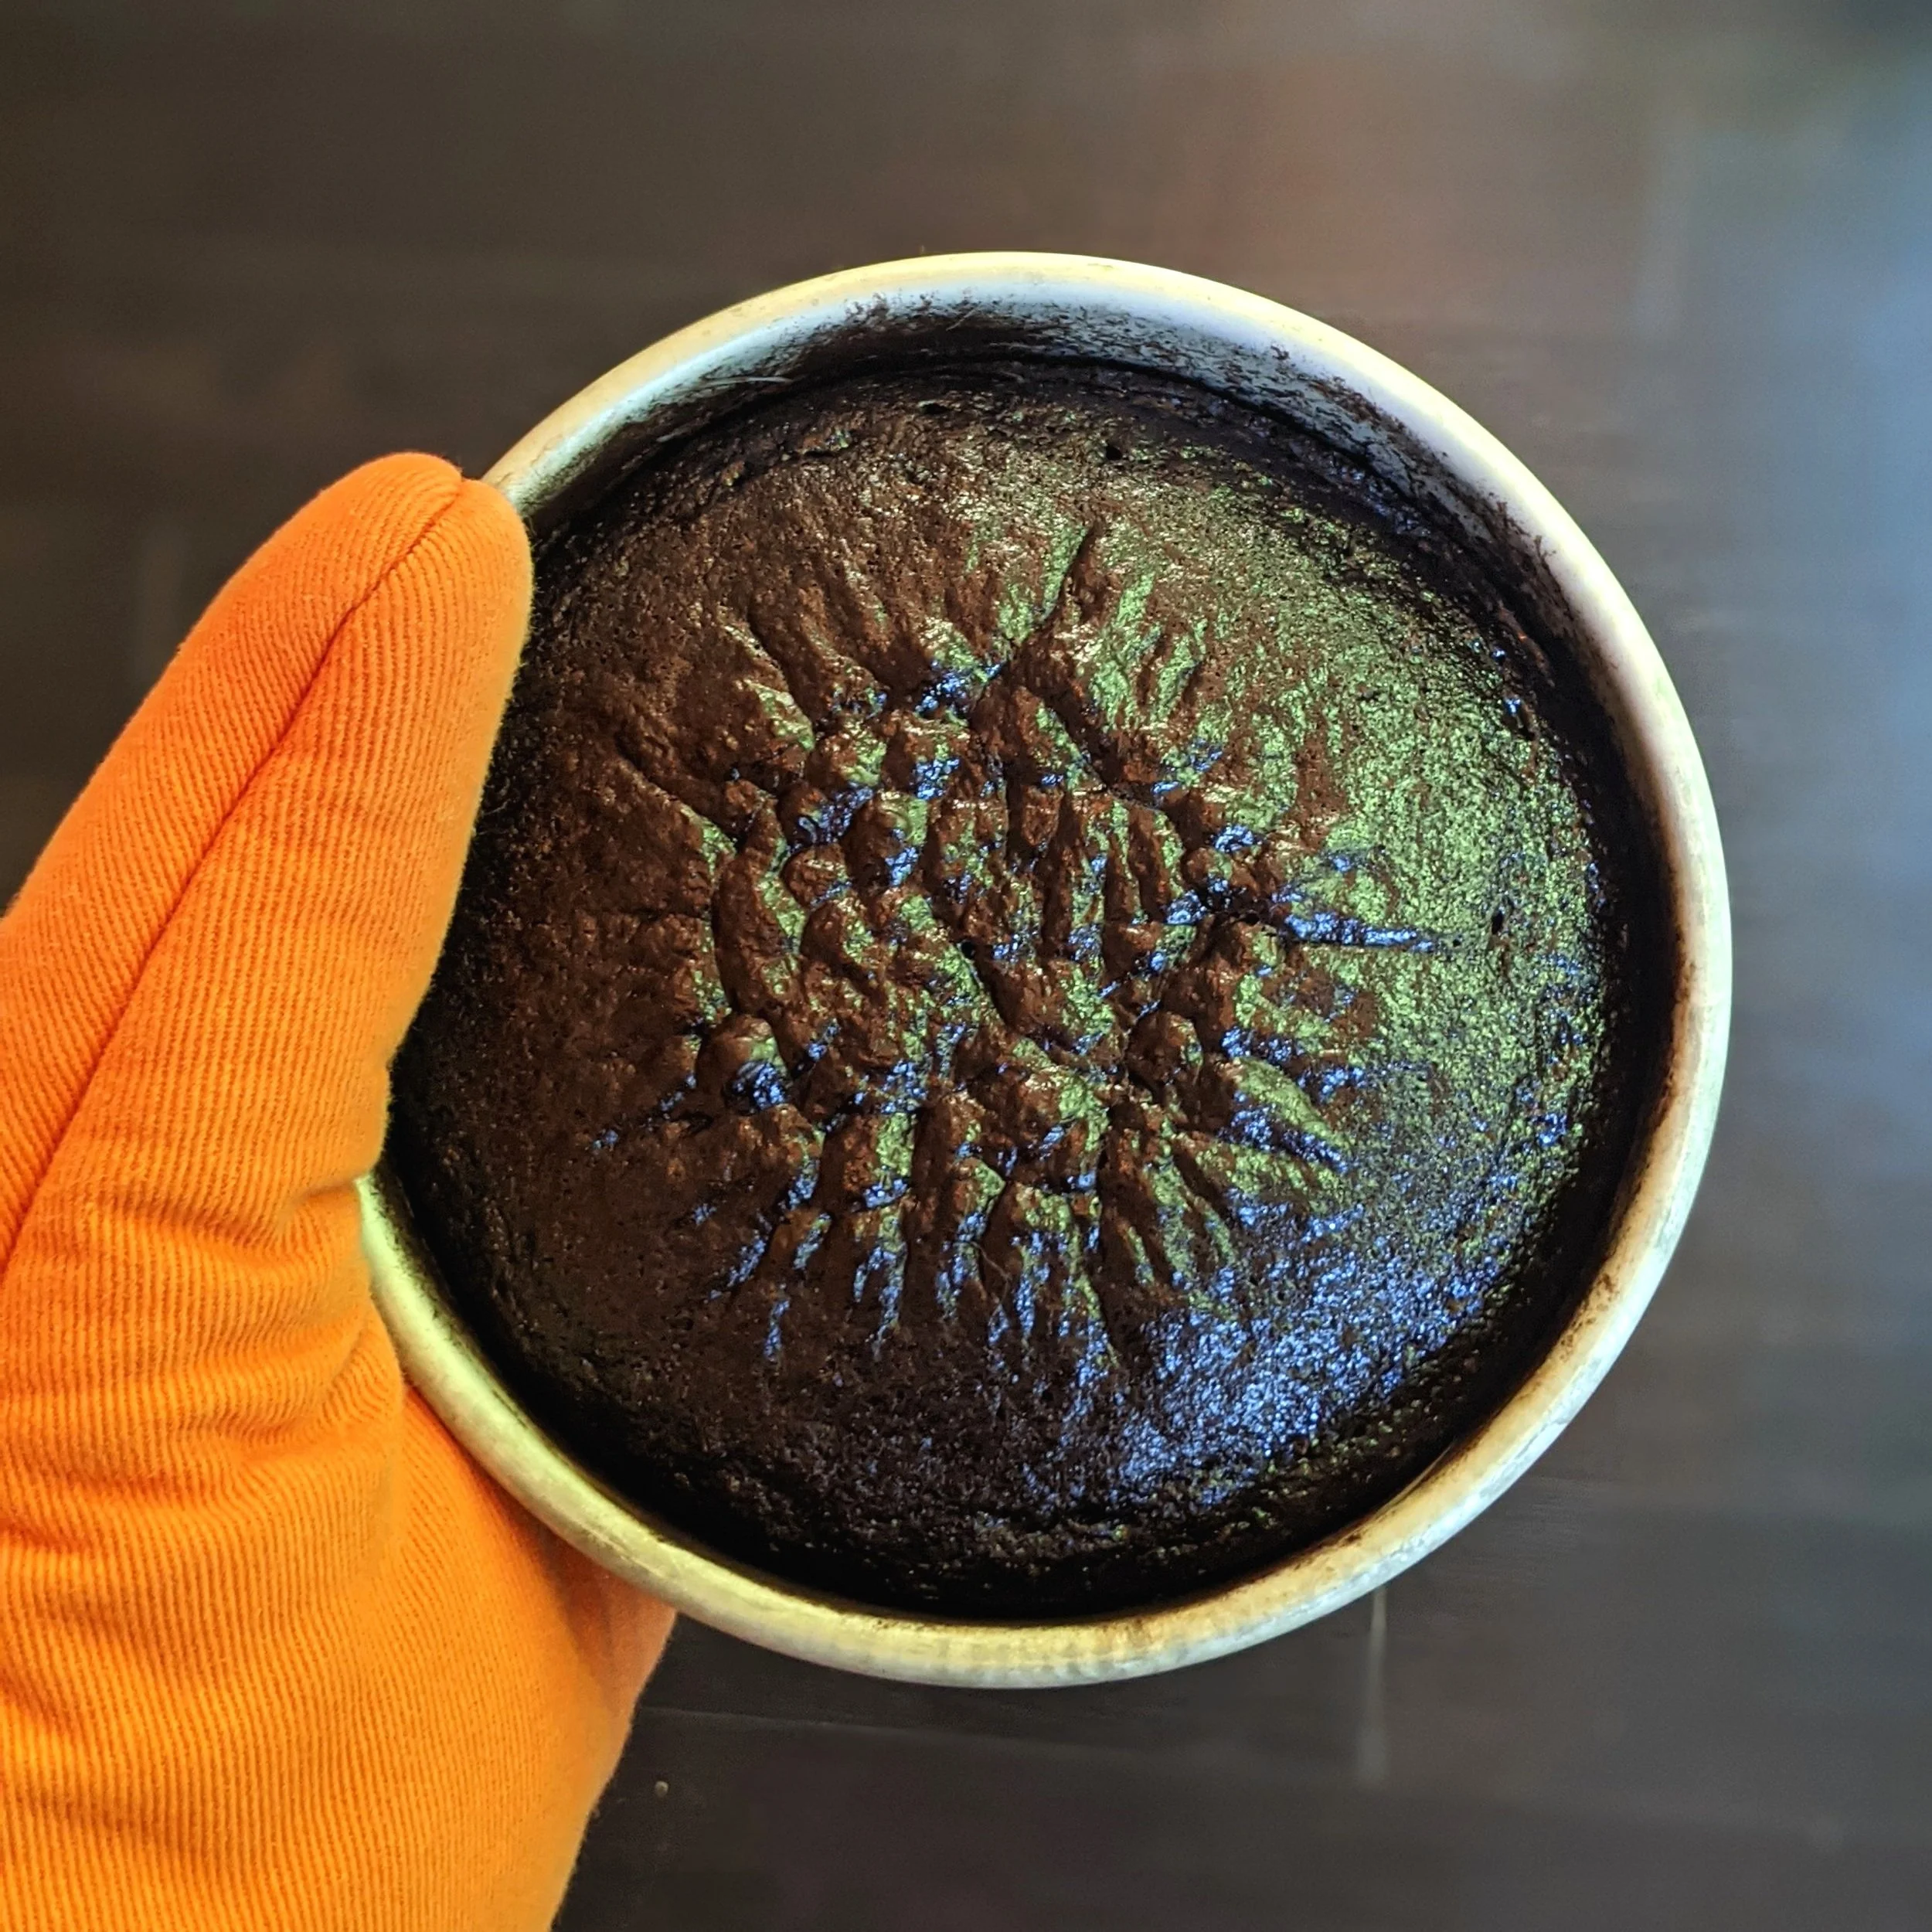
For 6-inch cakes, bake for 25-30 minutes. For 8-inch cakes, bake for 30-40 minutes. Finished cakes should spring back when gently touched, and a toothpick inserted into the center will come out clean or with a few moist crumbs on it.
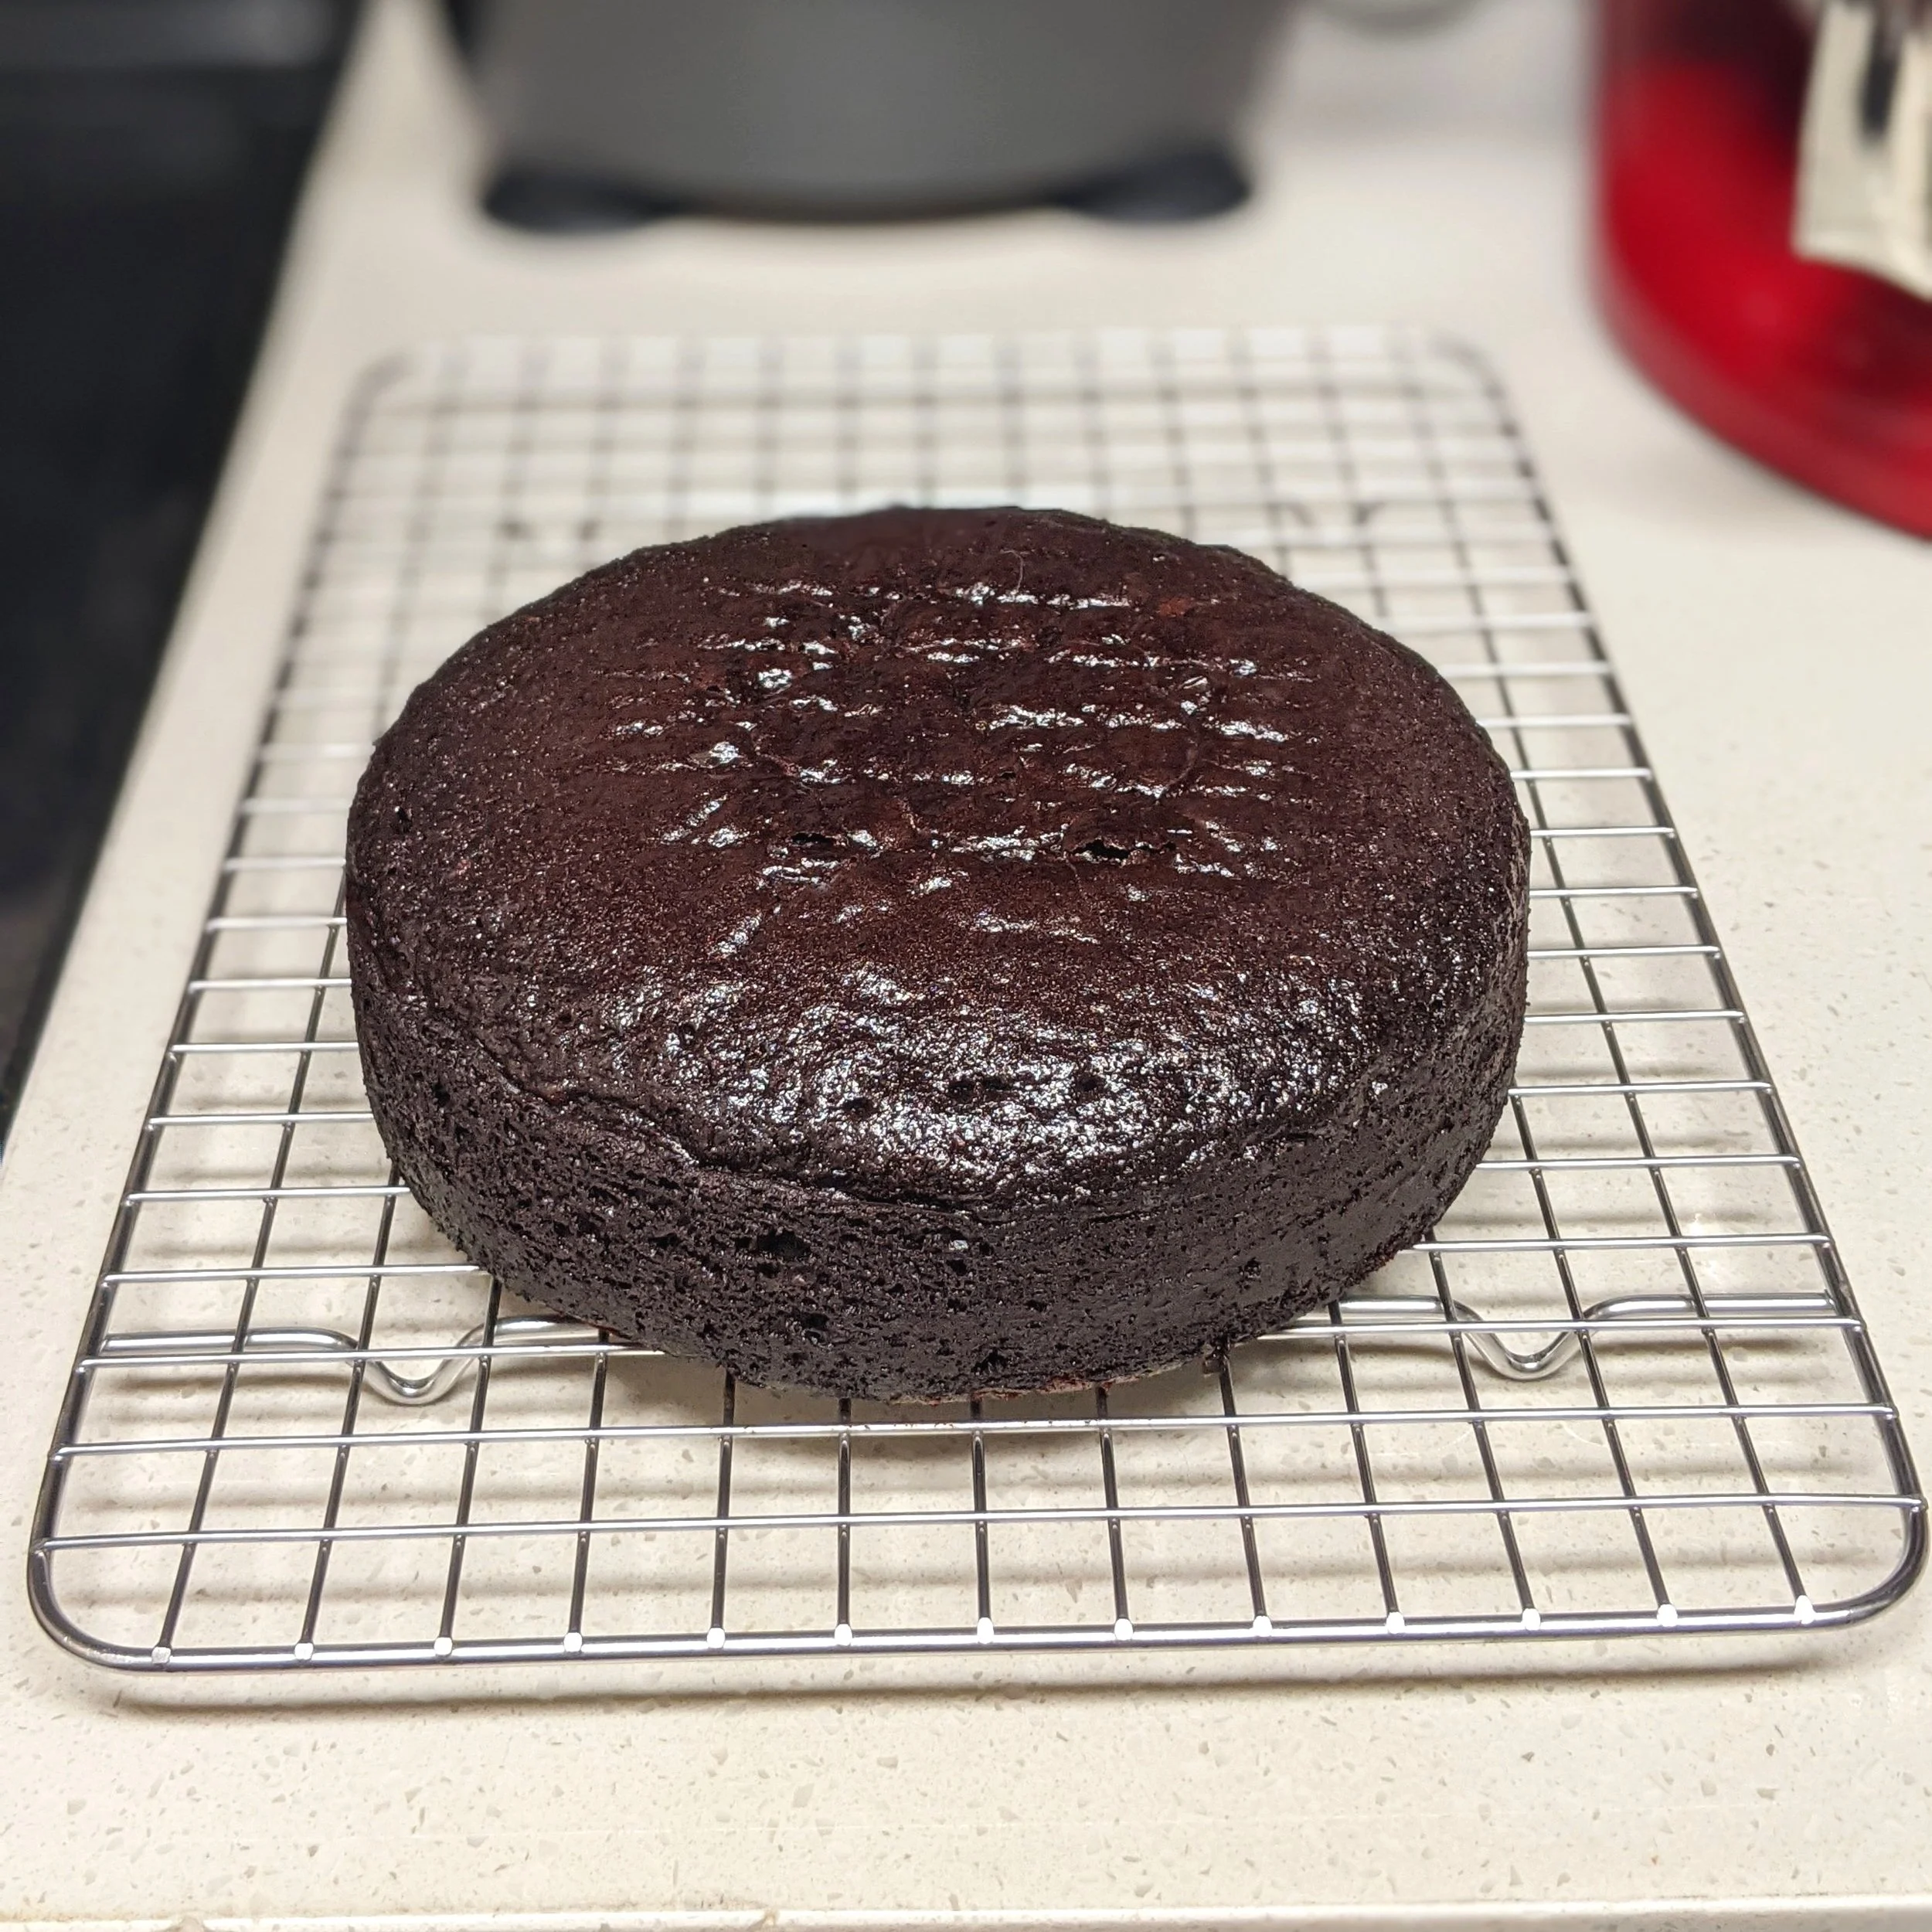
Tip cakes out of pans, peel off parchment, and leave to cool right-side up on cooling racks until room temperature.
Step 4:
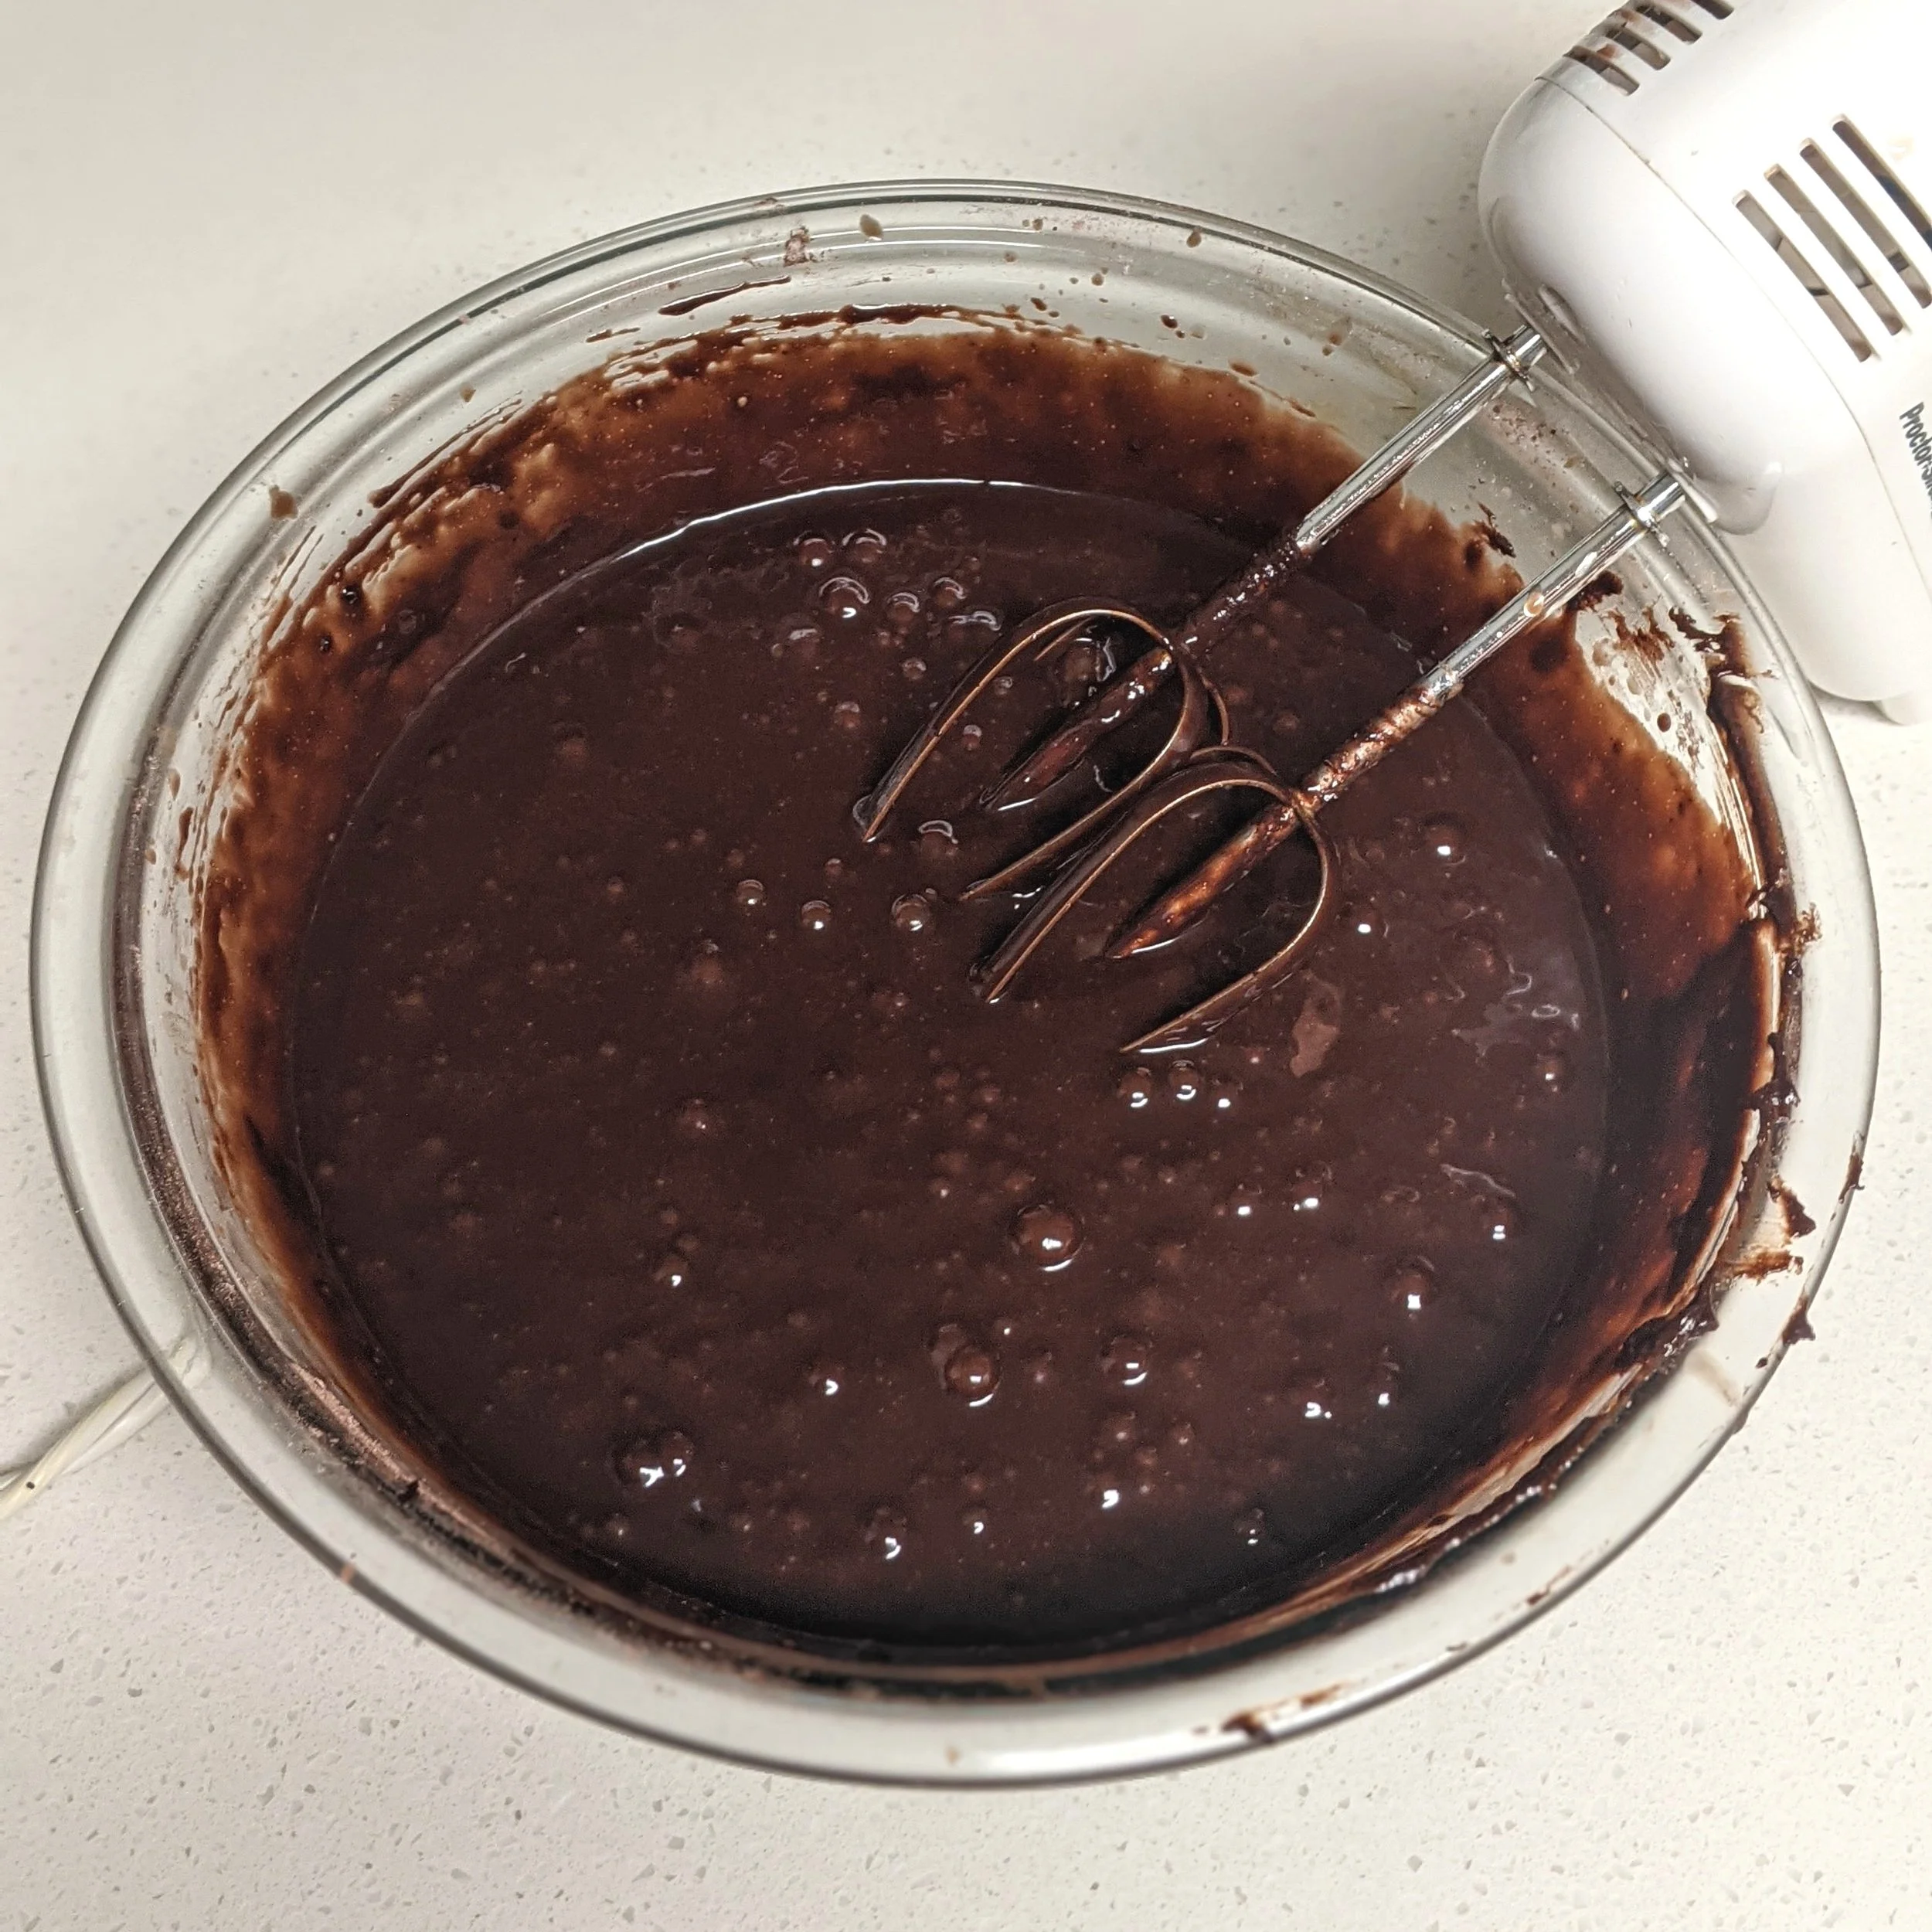
Make Ganache

Into a small saucepan, pour 1 ¼ cups of heavy cream.

Place over medium heat.

When cream starts to steam and just bubble around the edges slightly, remove from heat.

Add 16 ounces of dark chocolate.
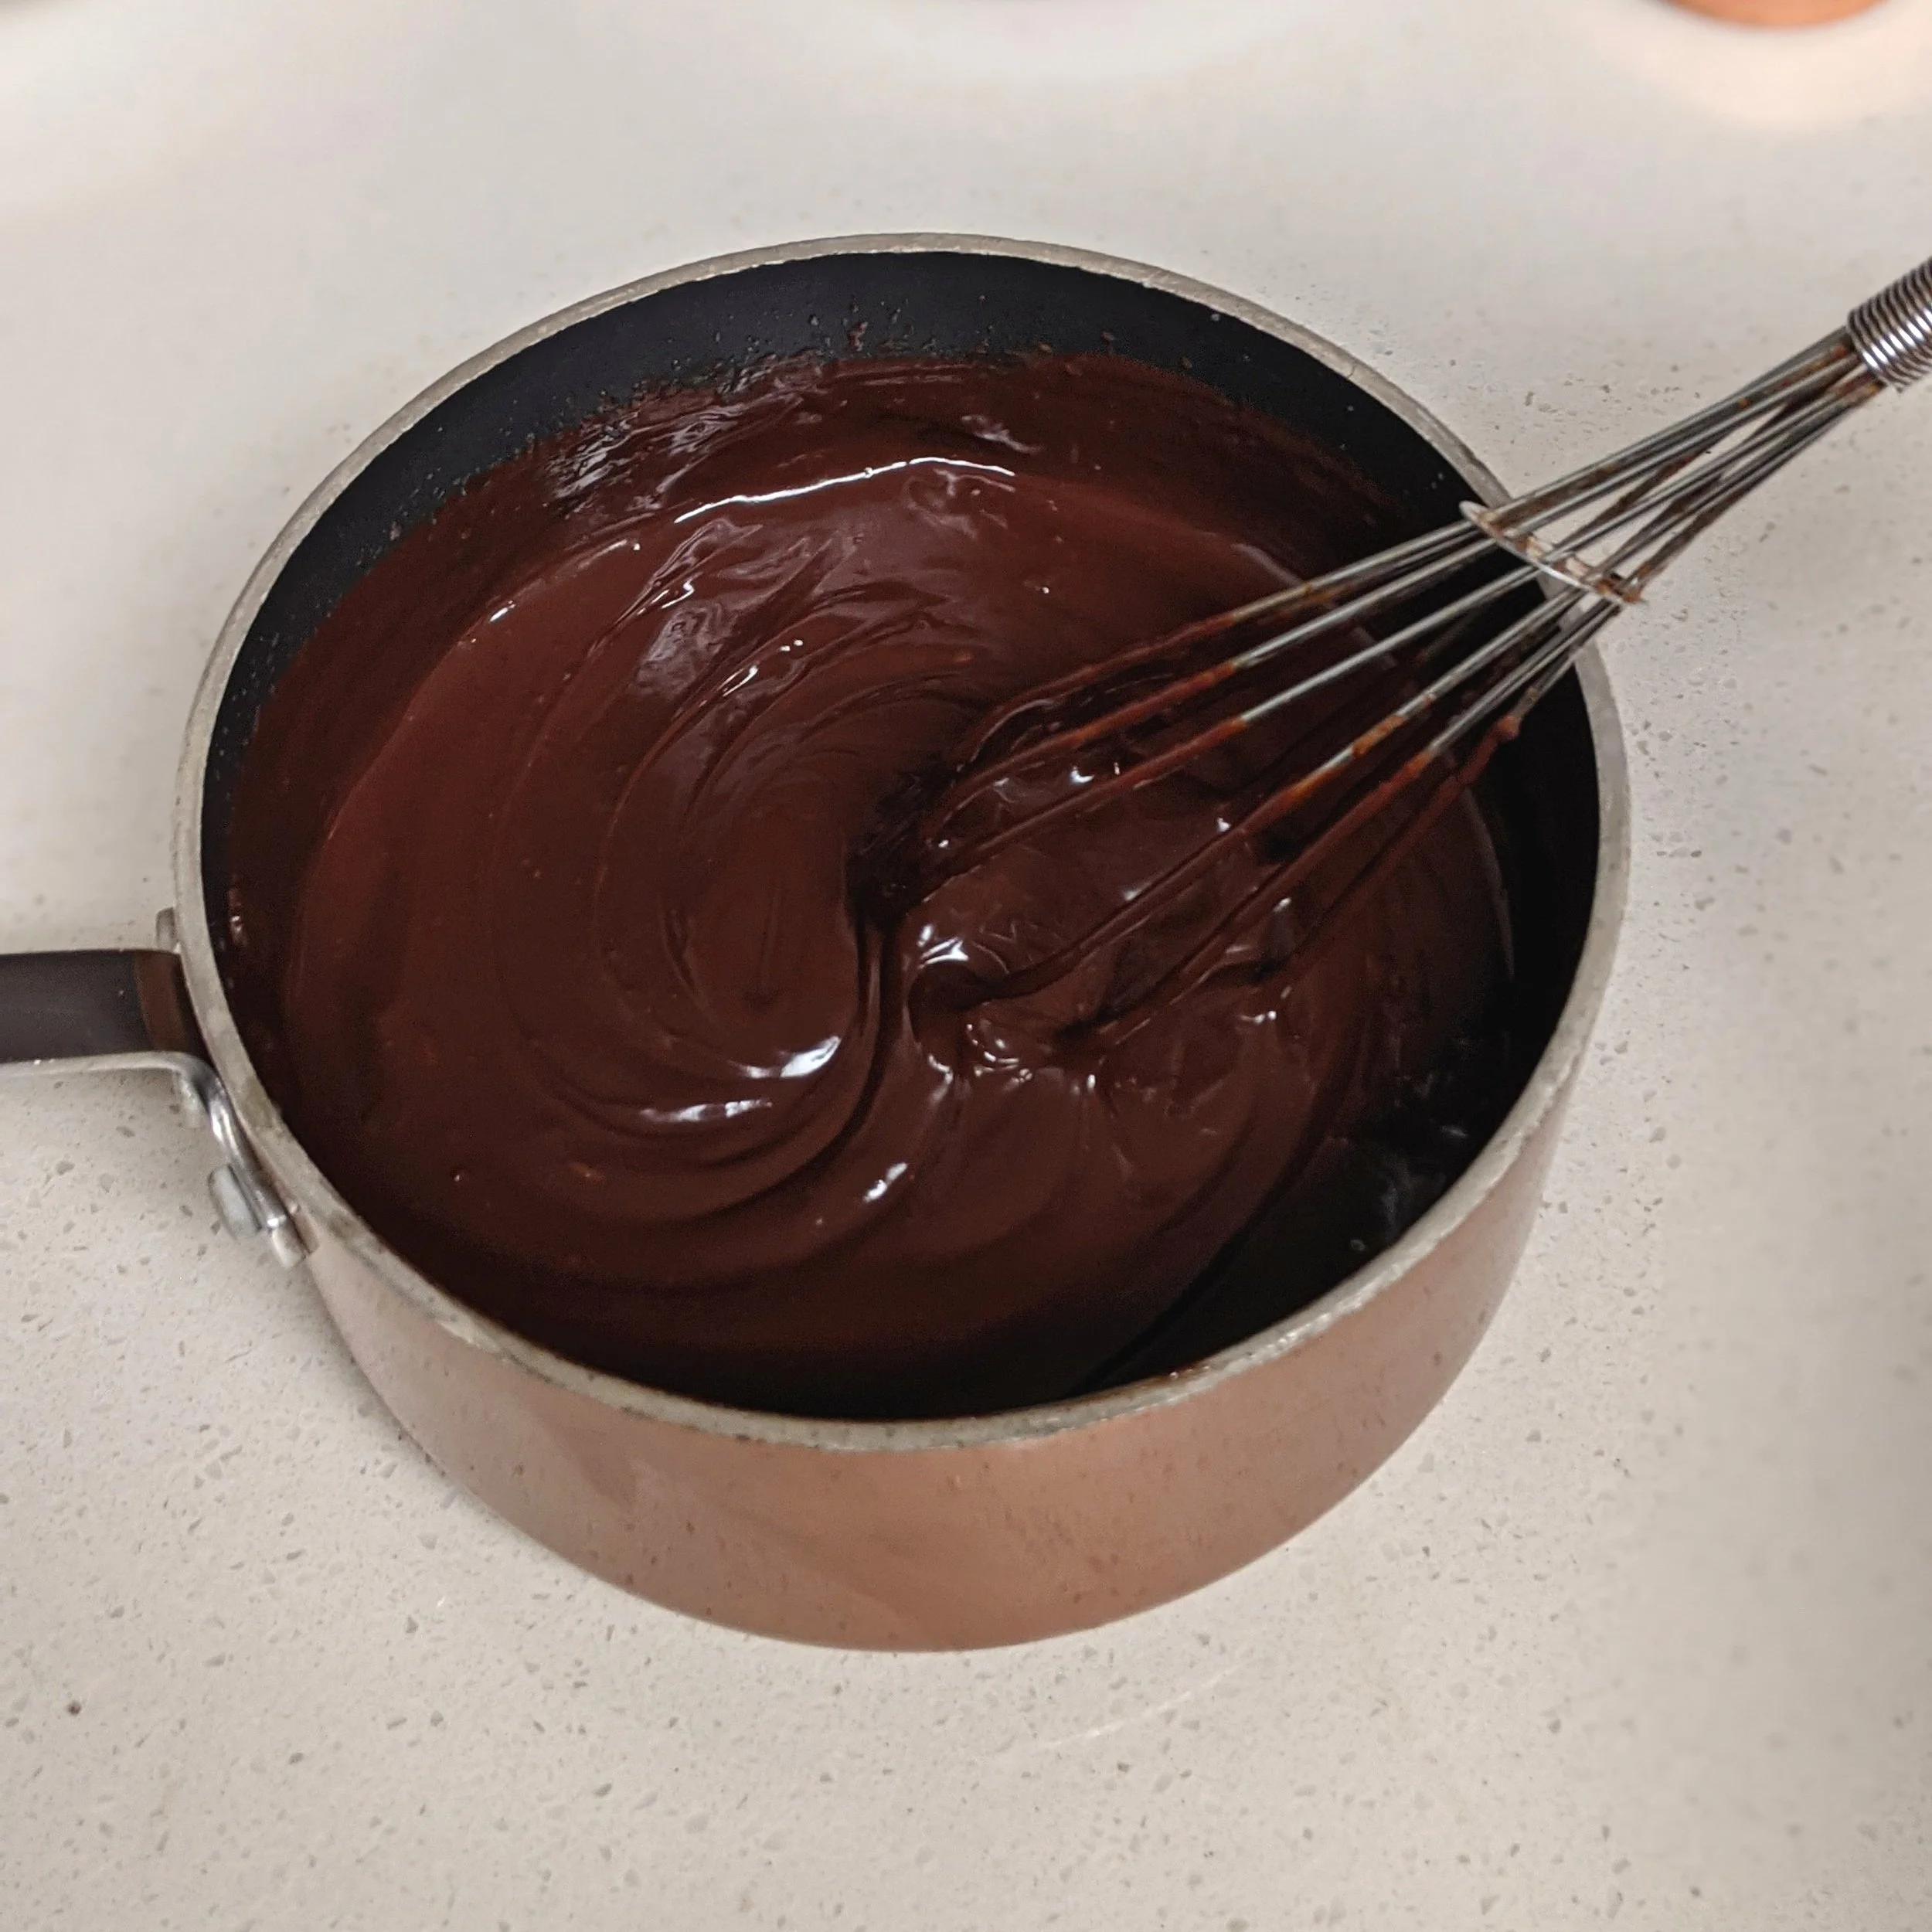
Whisk until chocolate is fully melted.
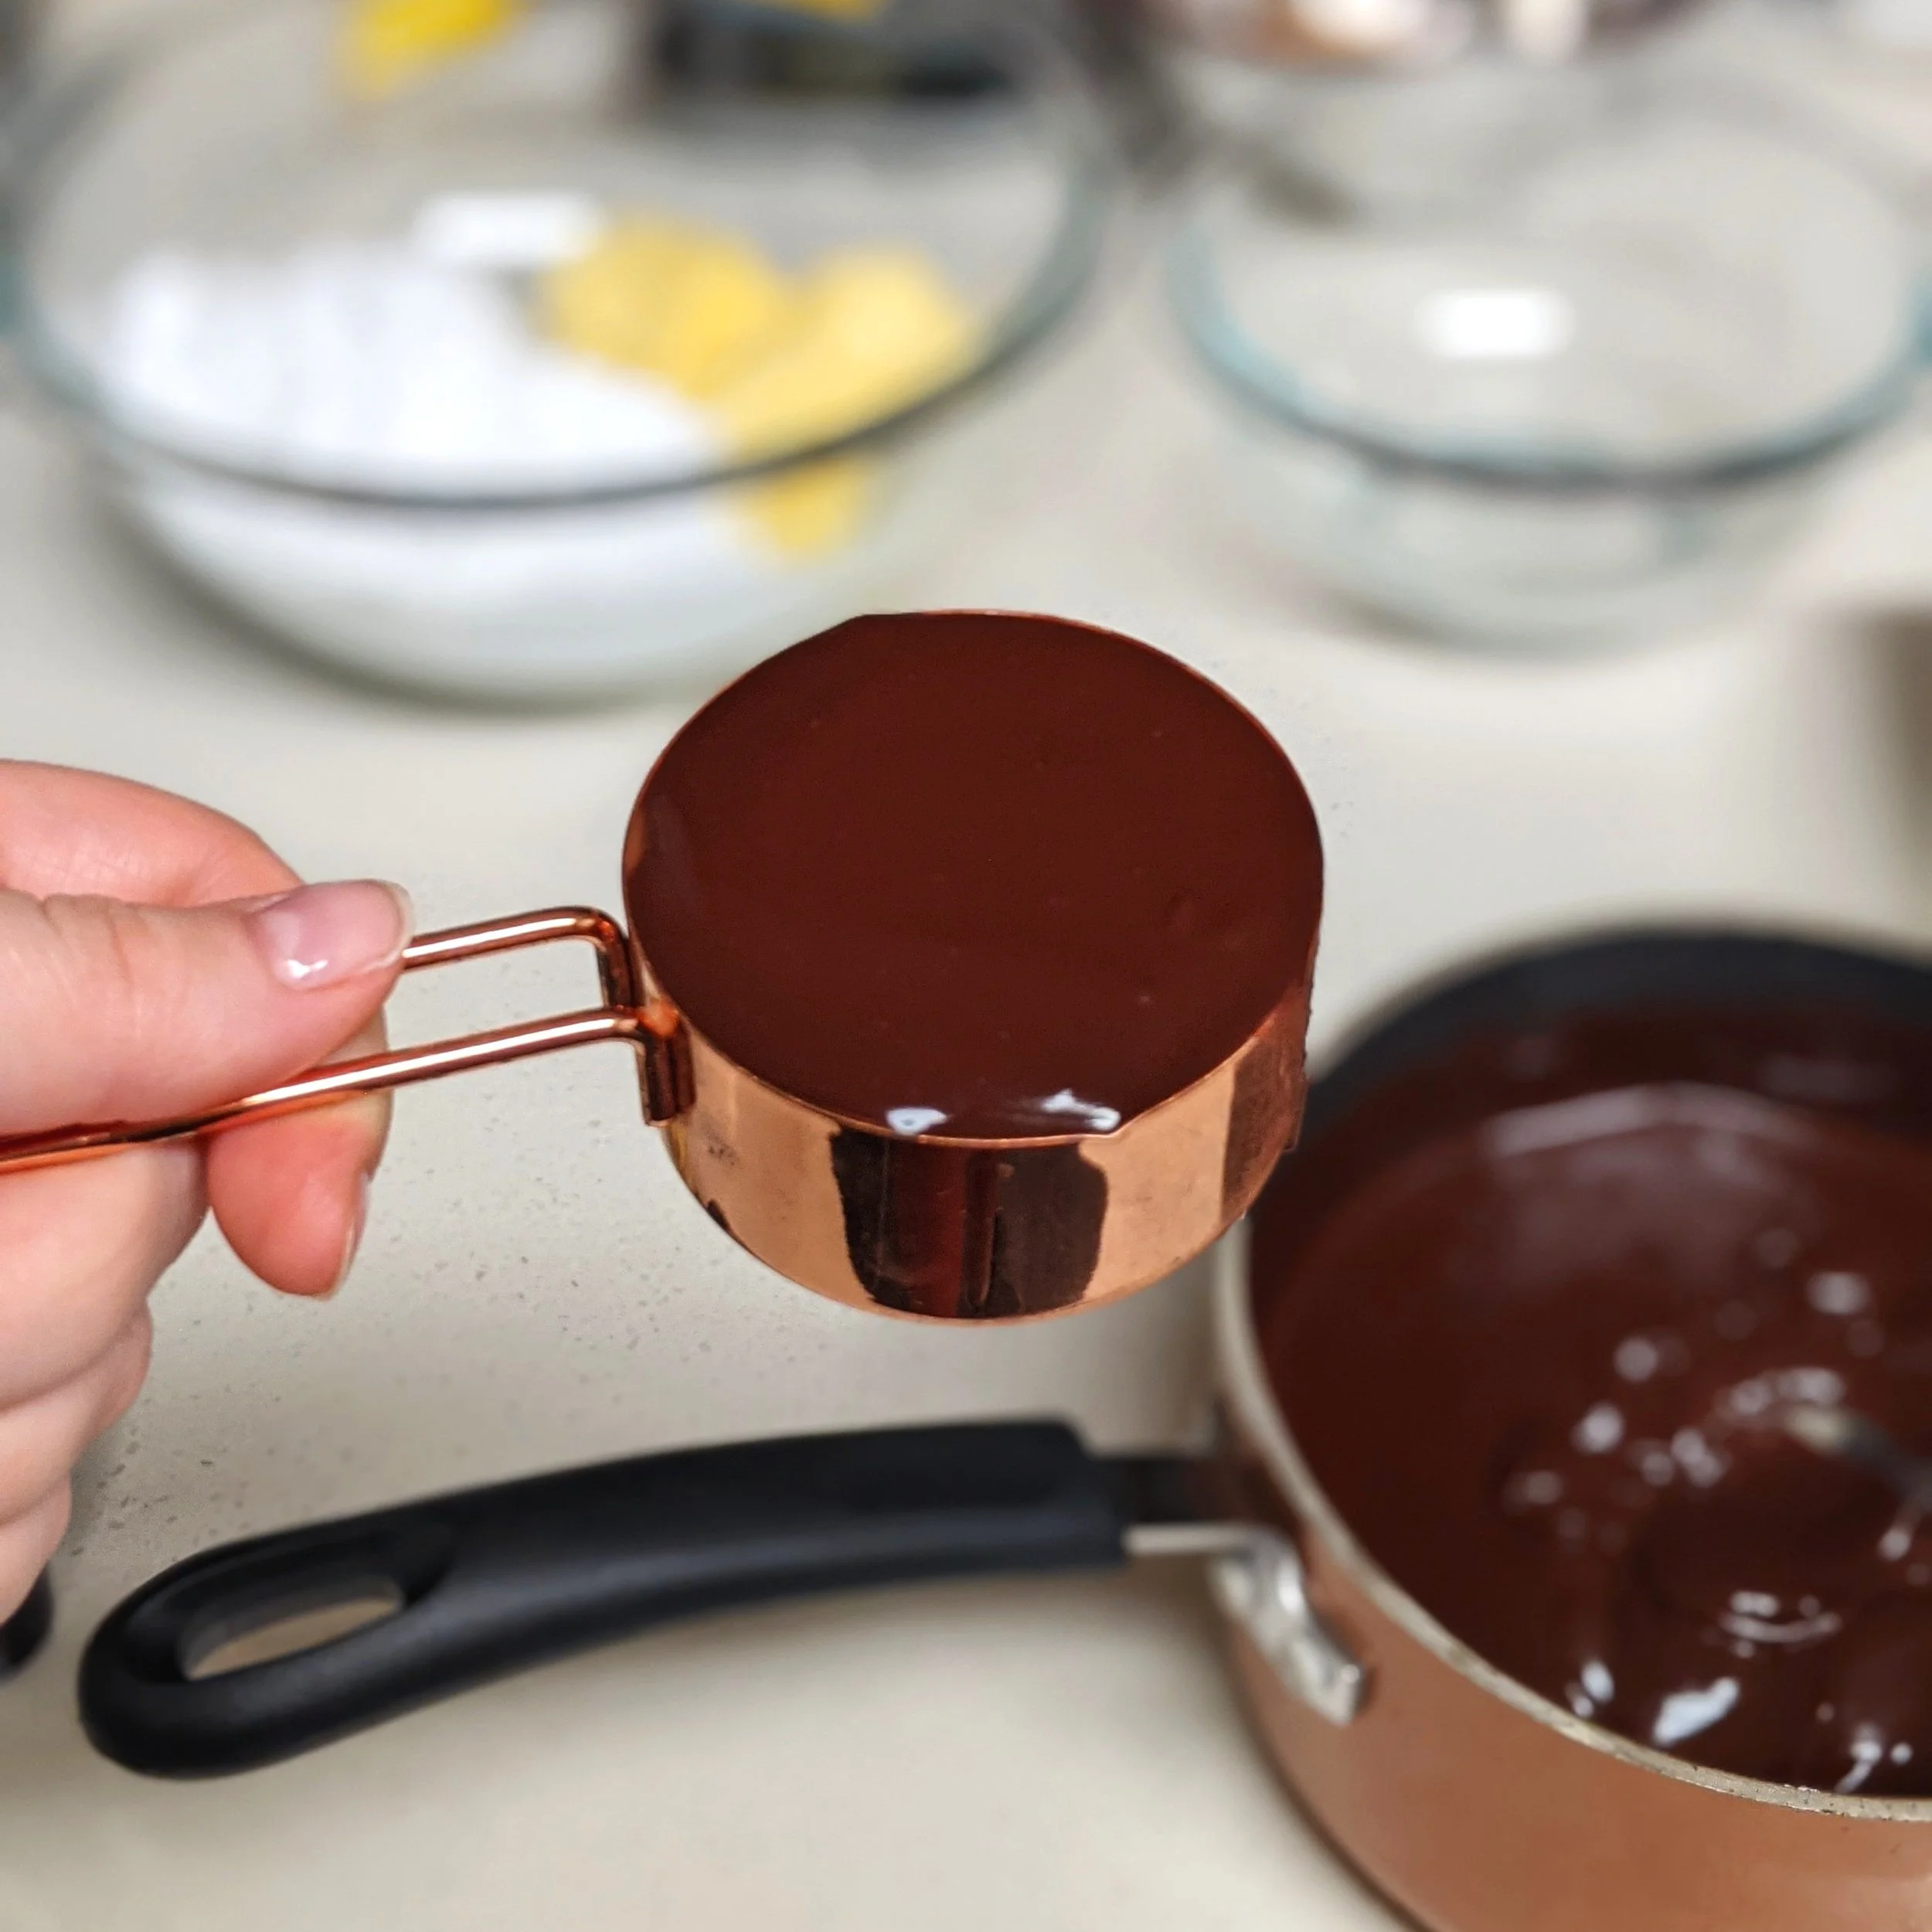
Set aside ⅓ cup of the ganache to use later.

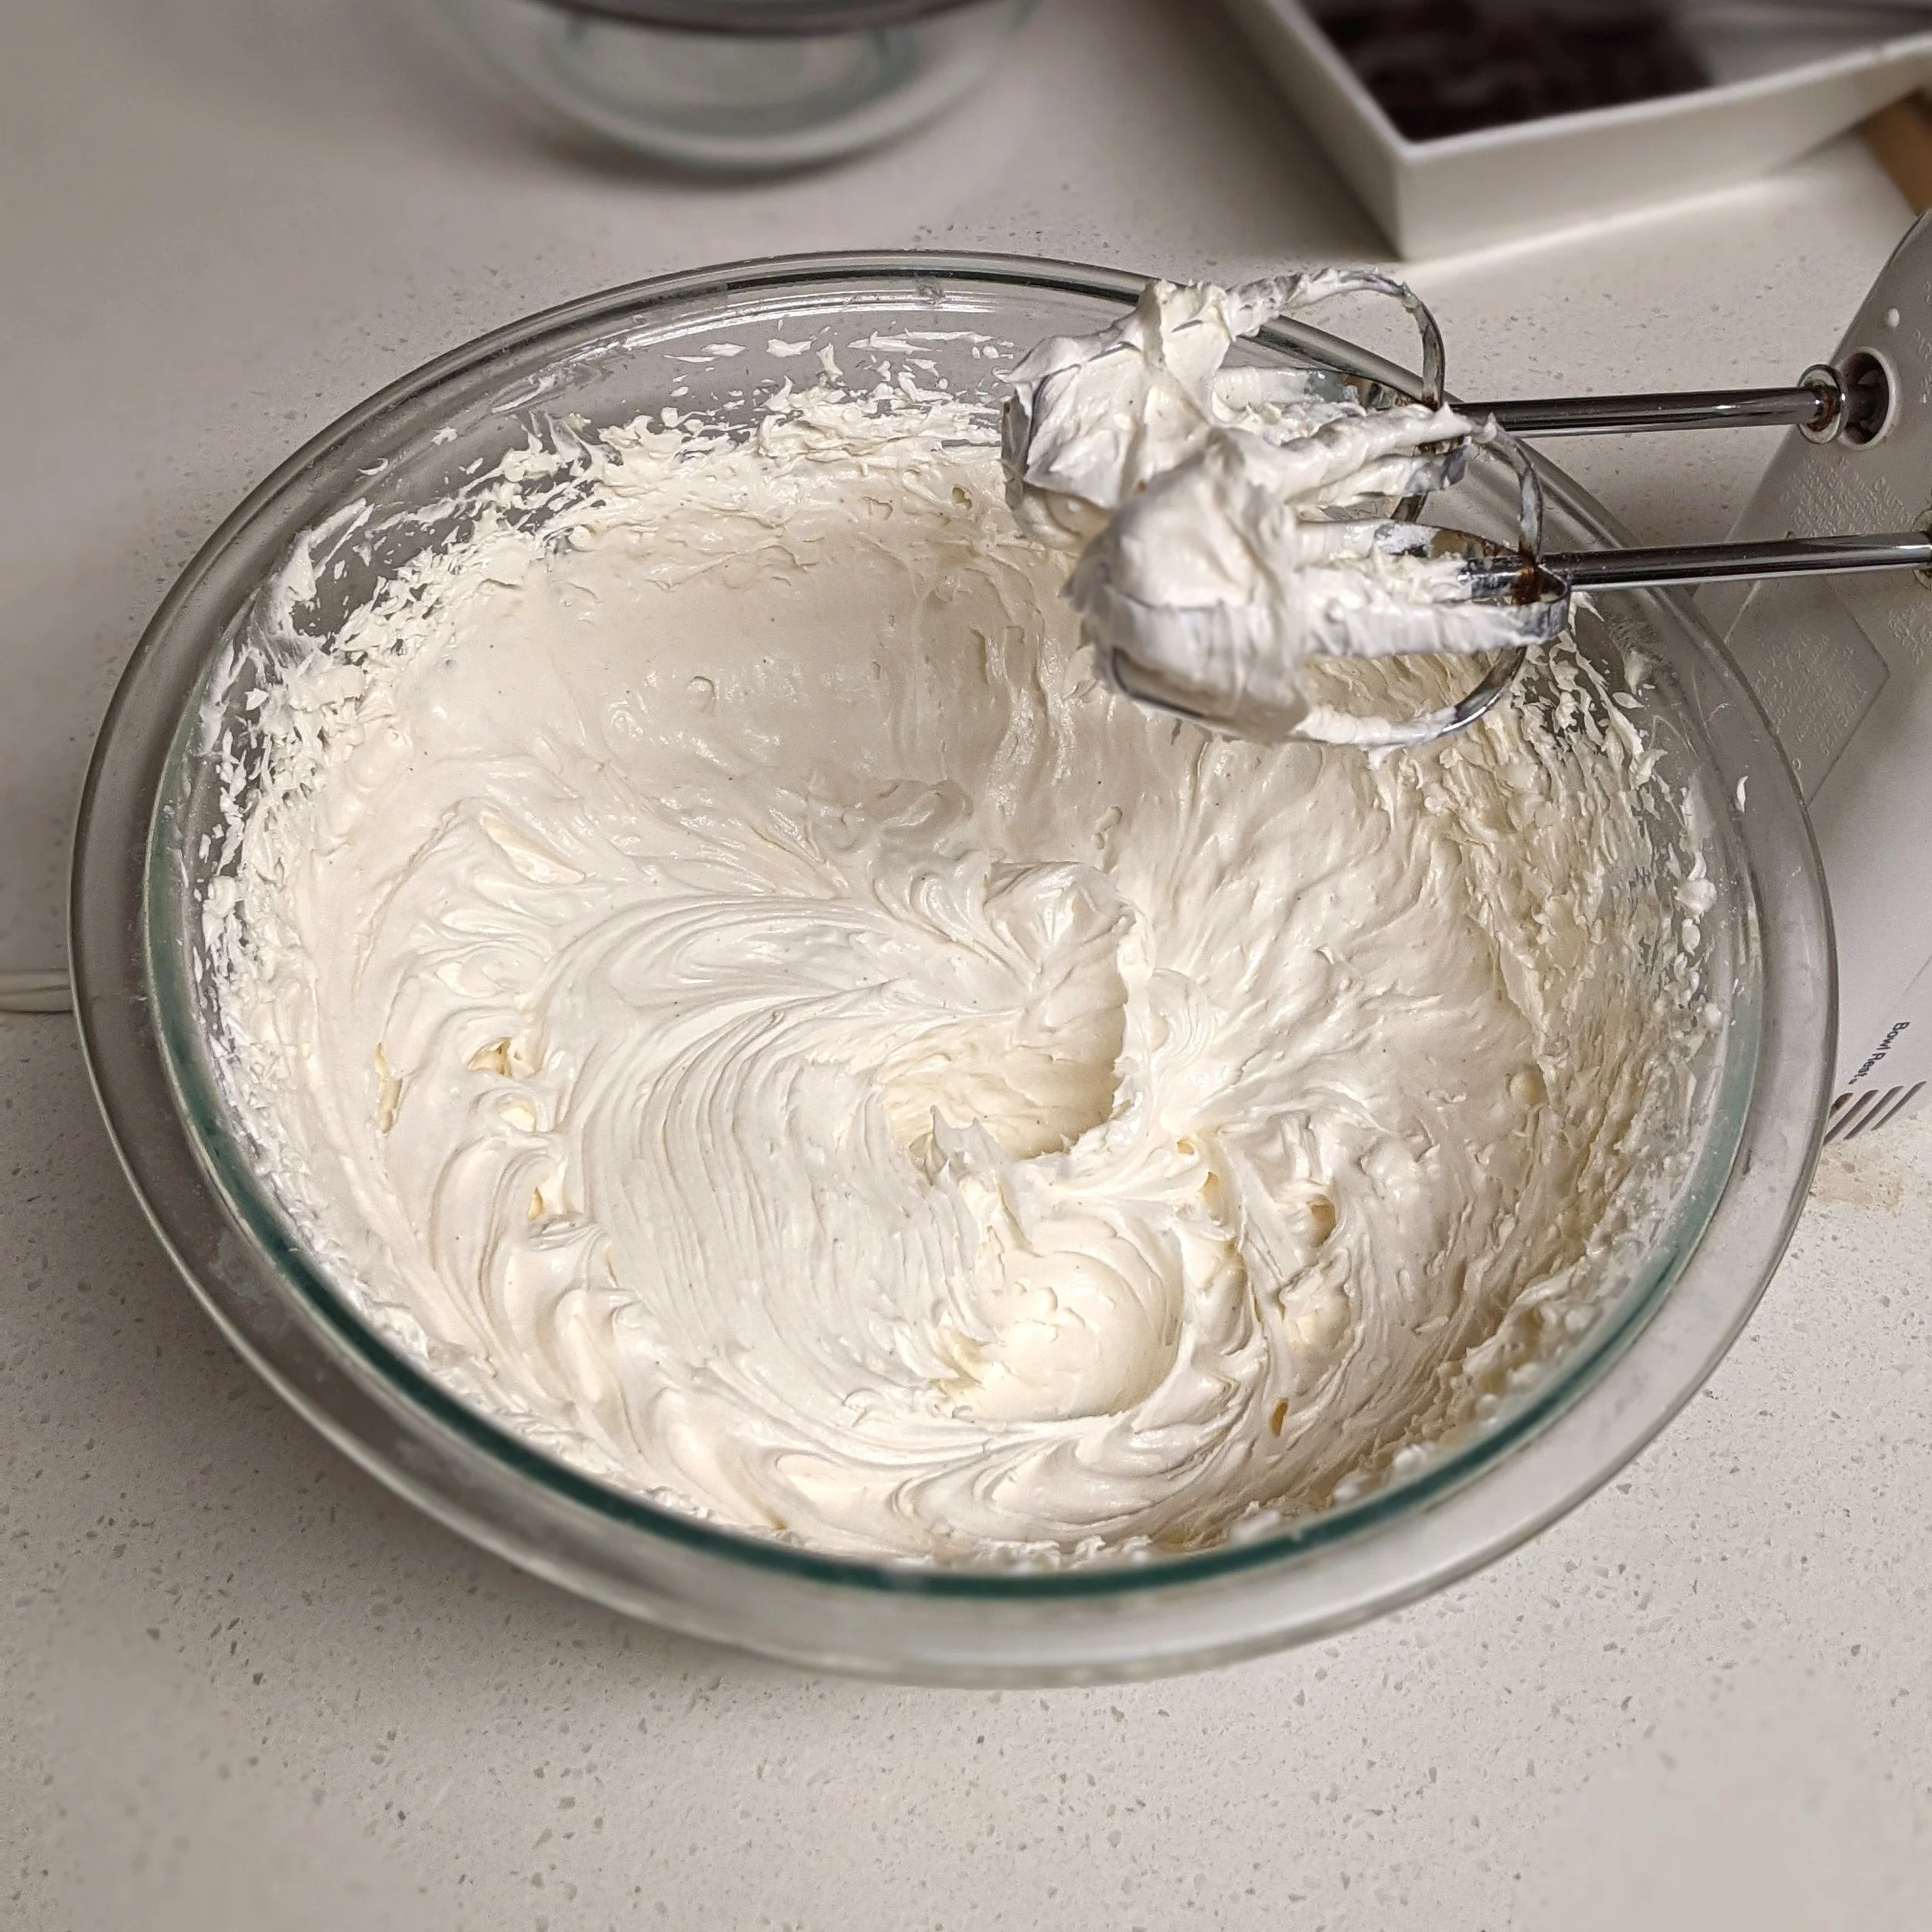
Place remaining ganache in refrigerator in a large mixing bowl for 45 minutes. It should be cool but still soft after that time.
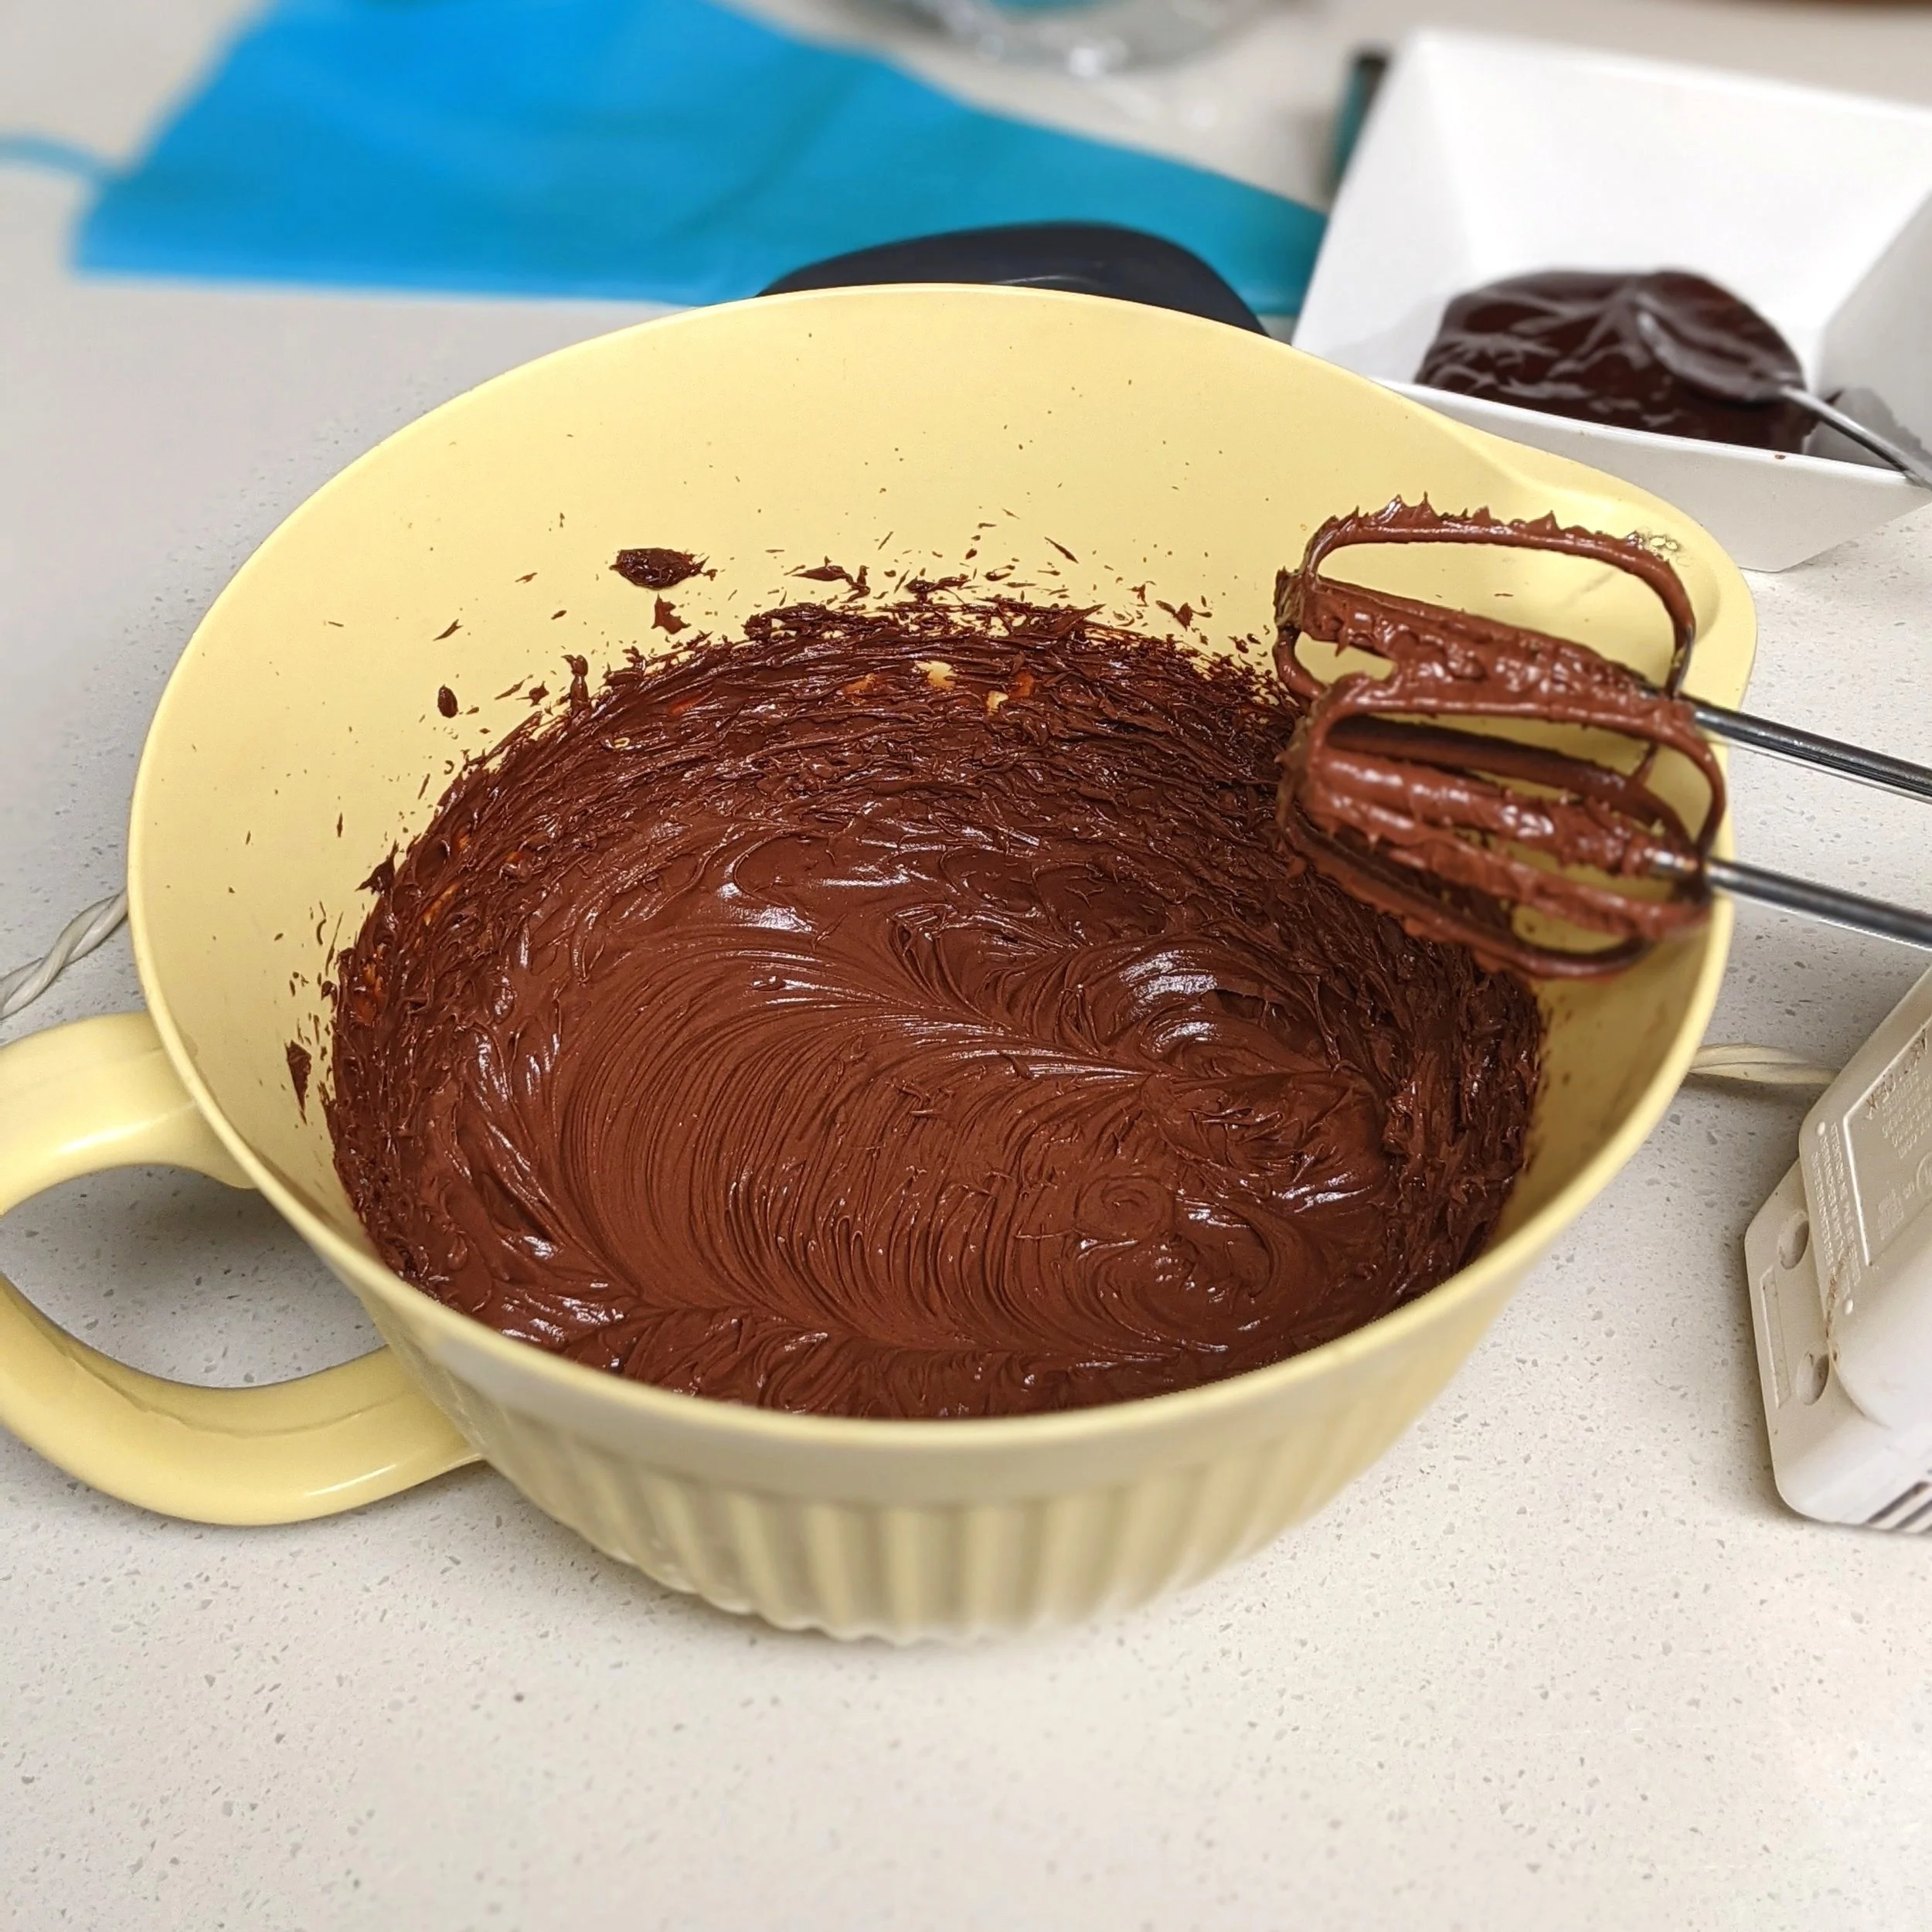
Remove from fridge and beat on medium speed for 5 - 10 minutes until very light and fluffy.
Step 5:
Make Cream Filling

In a medium mixing bowl, add ¾ cup softened salted butter, 1 ½ cups powdered sugar, 1 ½ teaspoons vanilla extract or vanilla bean paste, and 2 tablespoons heavy cream.
Beat with an electric mixer on medium speed for 10 minutes until very light and fluffy.
Step 6:
Build Cake

Use a long, serrated bread knife to trim the domed tops from the cakes and make them flat and even. Save the tops for snacking or making cake pops!

Place the first layer of cake on a cake plate. If you have a rotating decorating stand, place the cake plate on that to decorate.

Brush the surface of the cake with sugar syrup using a pastry brush, or if you don’t have one, gently and evenly spoon the sugar syrup onto the surface of the cake.

Scoop some of the whipped ganache into a piping bag with the end cut off, or with a large round piping tip.

Pipe a border of whipped ganache around the edge of the cake layer.

Fill the border of whipped ganache with the vanilla cream.

Sprinkle some toasted coconut over the vanilla cream filling.

Top with another layer of cake brushed with syrup. If you’re making a three layer cake, repeat the filling steps and top with the last cake layer, brushing it with syrup as well.
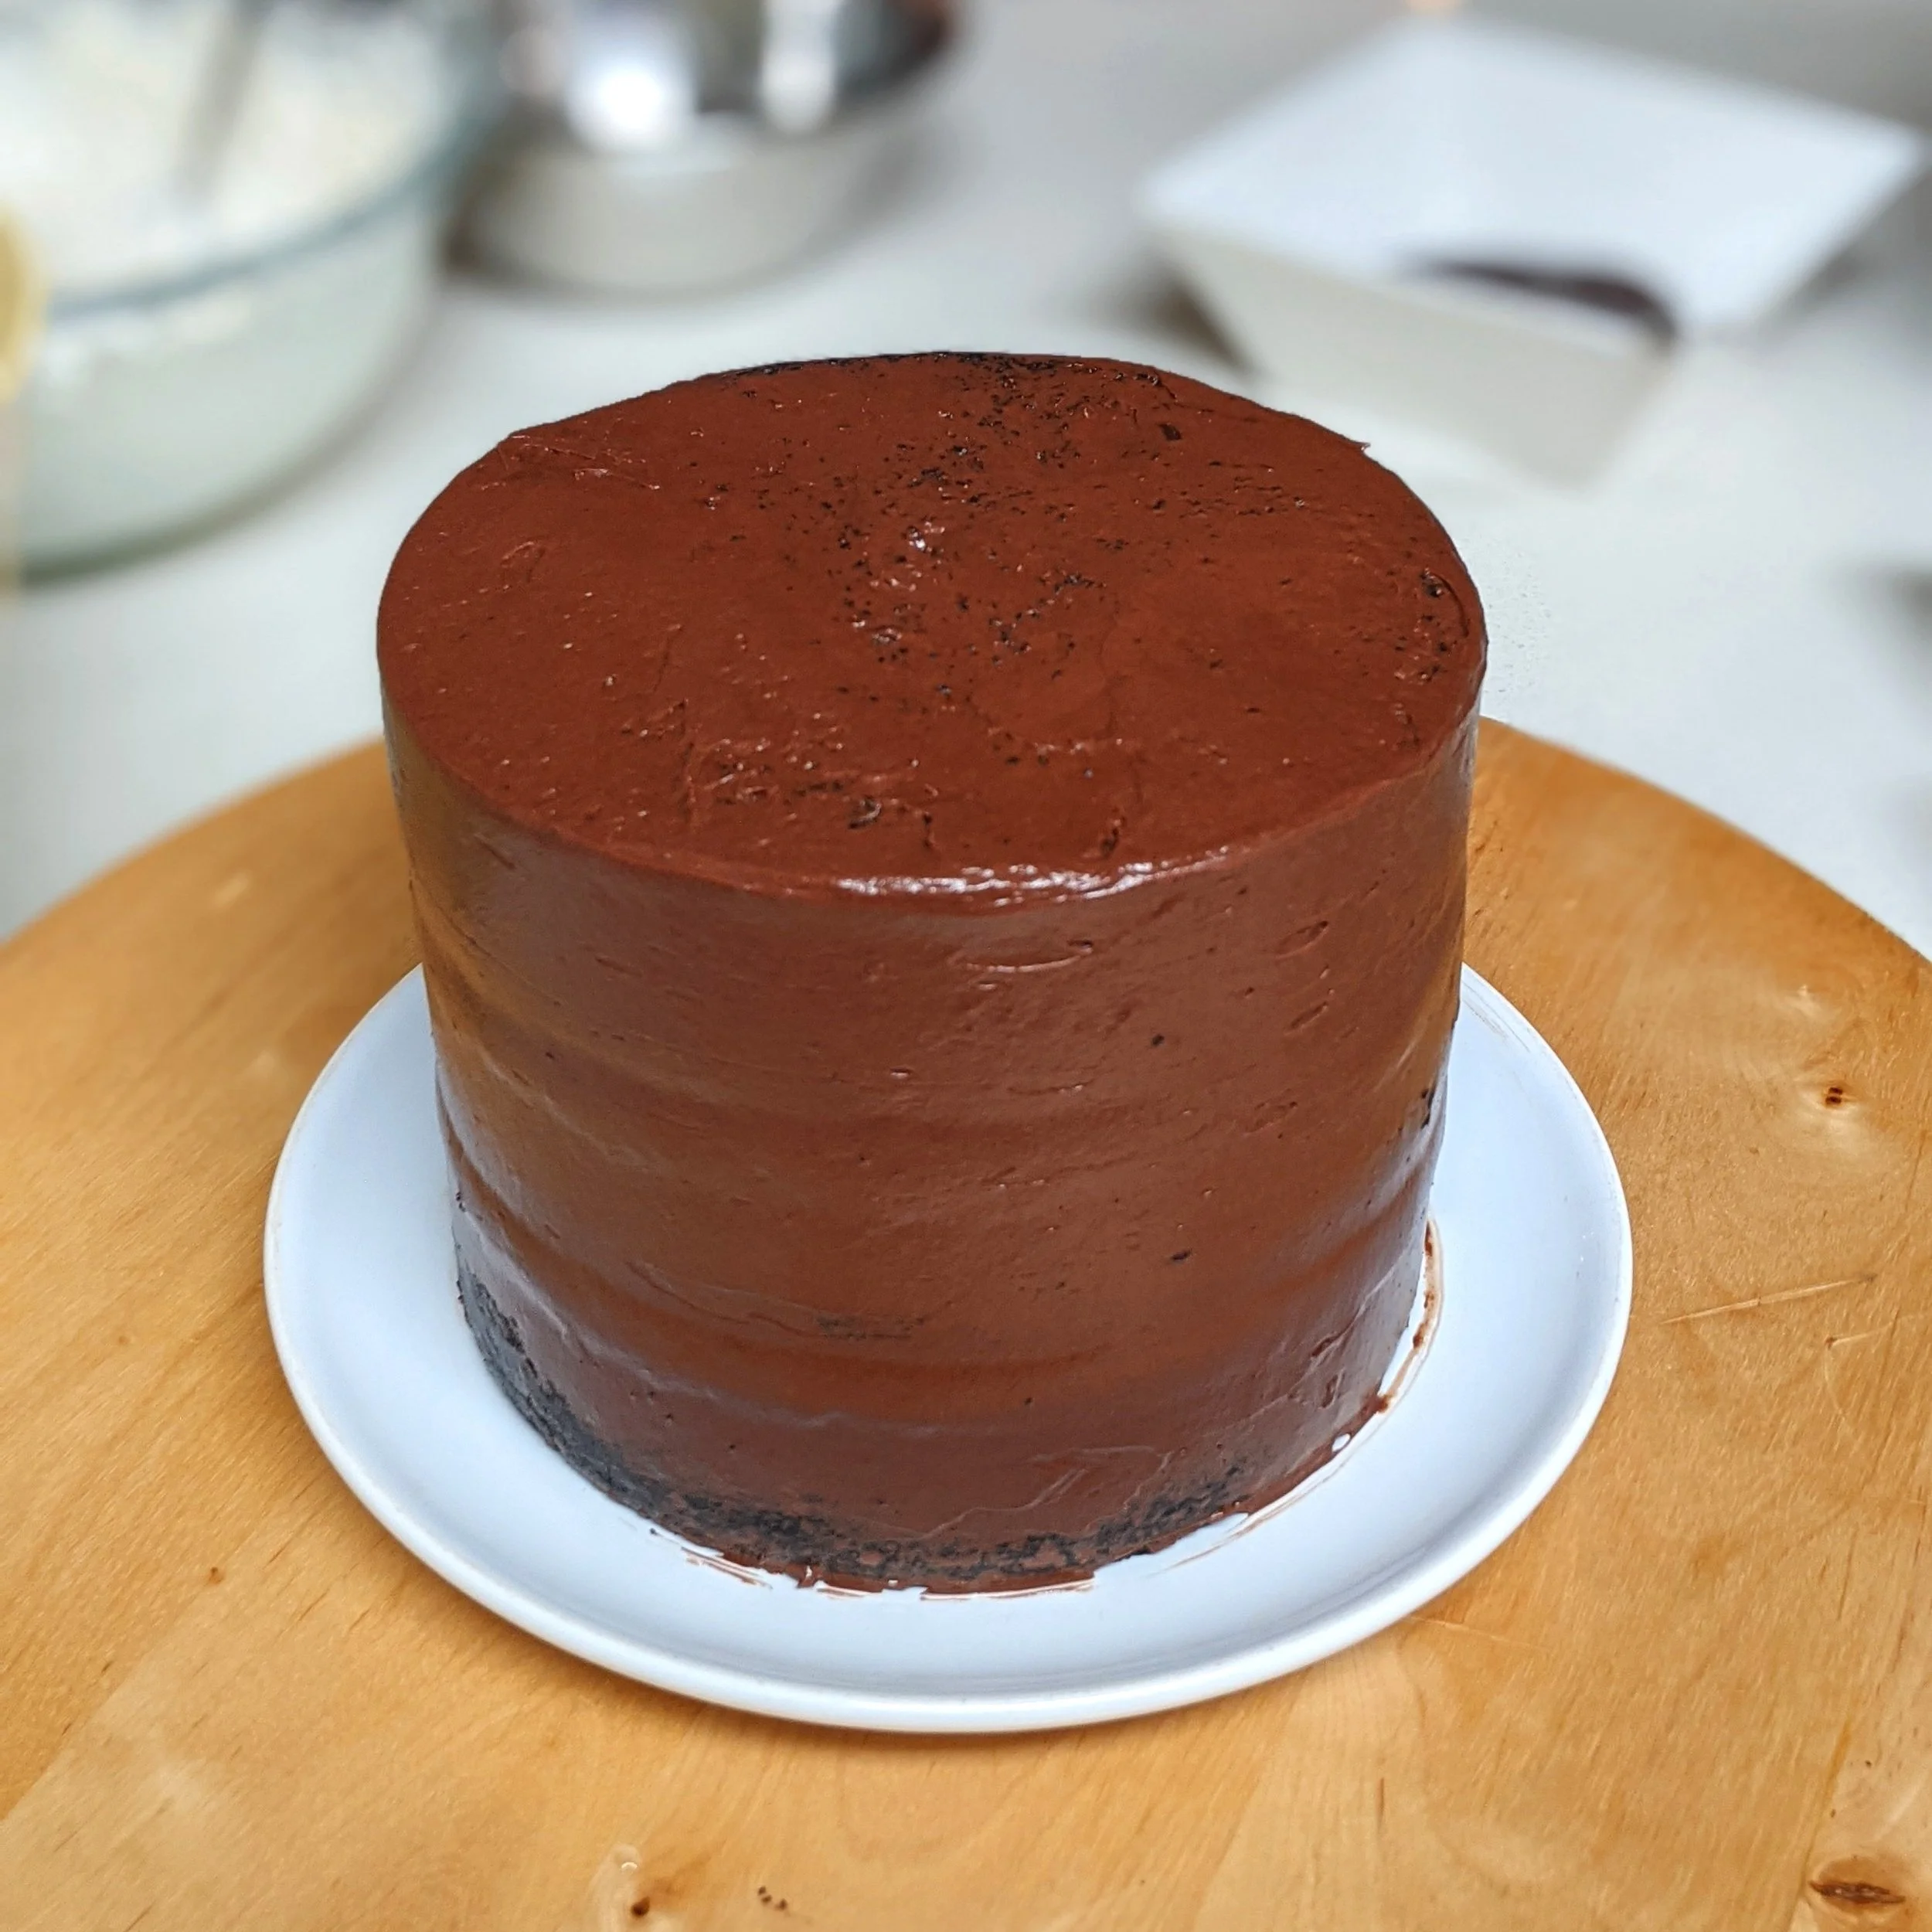
Coat the entire outside of the cake with a very thin layer of the whipped ganache, scraping it thin with a palette knife or scraper.

Place cake in the freezer for 15 minutes to harden the first coat of ganache (this is called the crumb coat, as it seals in loose crumbs from the cake).
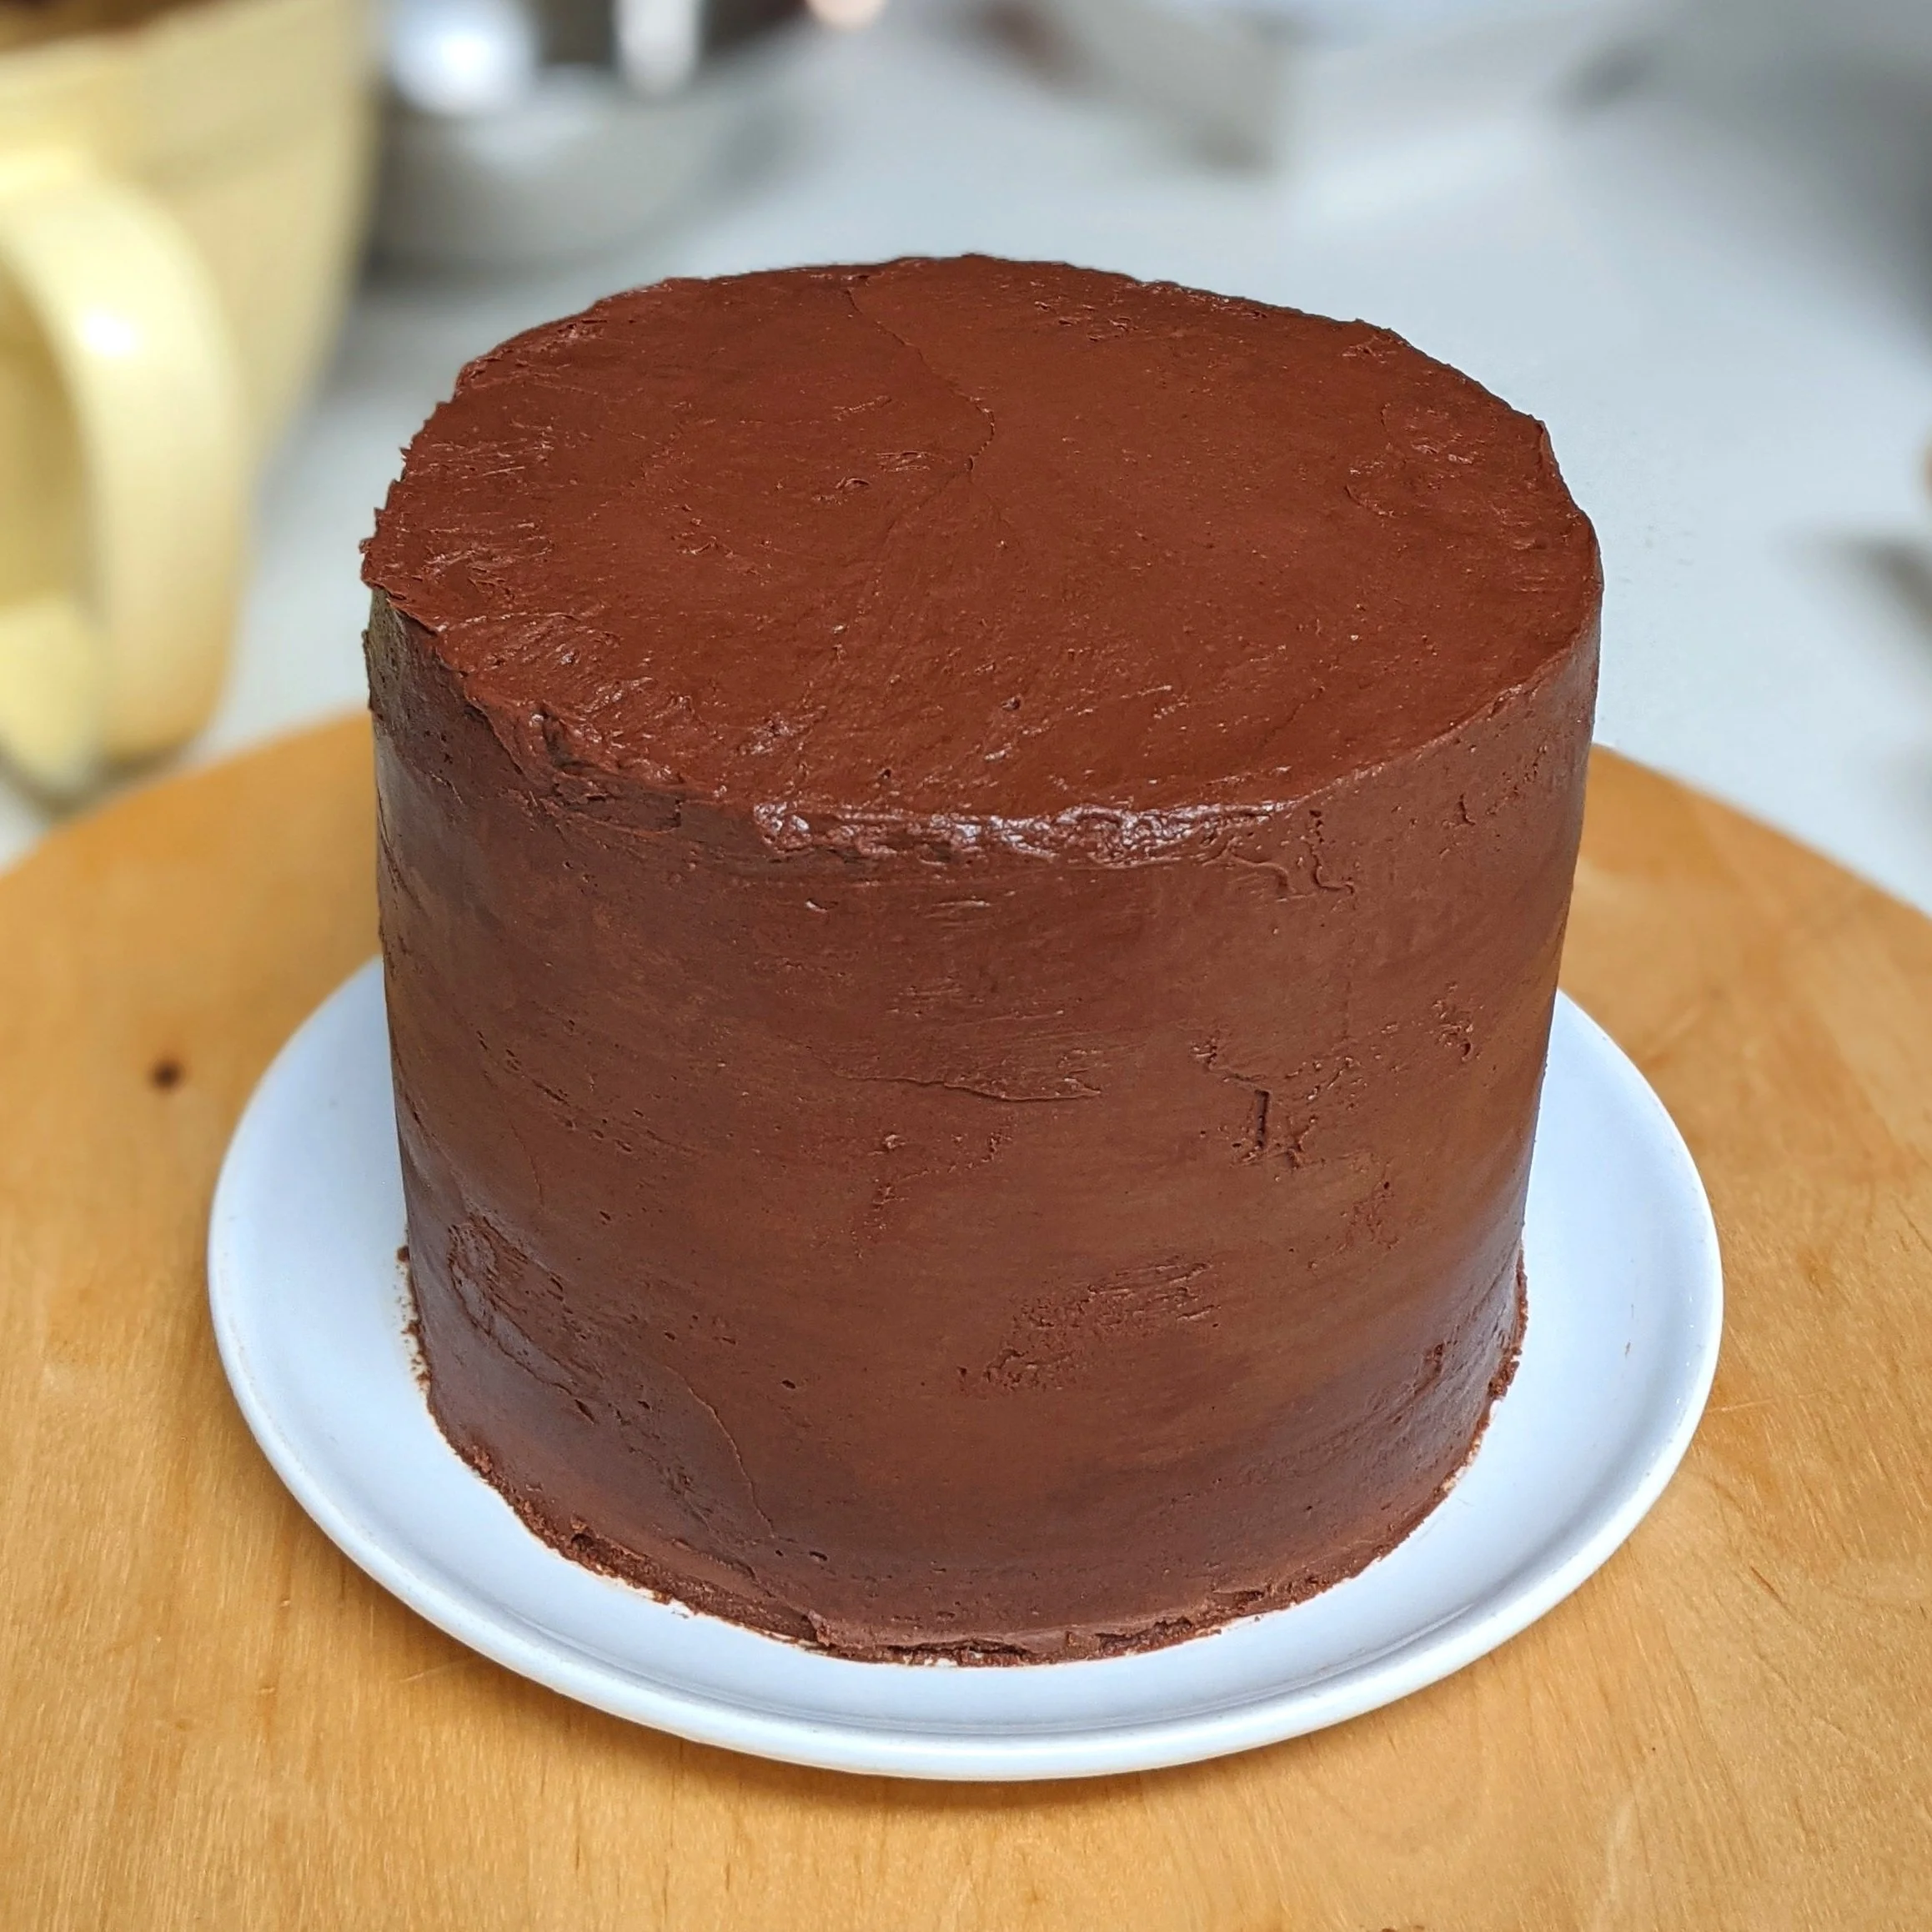
Once chilled, remove cake from freezer and coat with another layer of the whipped ganache.

Press toasted coconut onto the outside of the bottom third of the cake to decorate.

Place cake in the freezer for another 15 minutes.

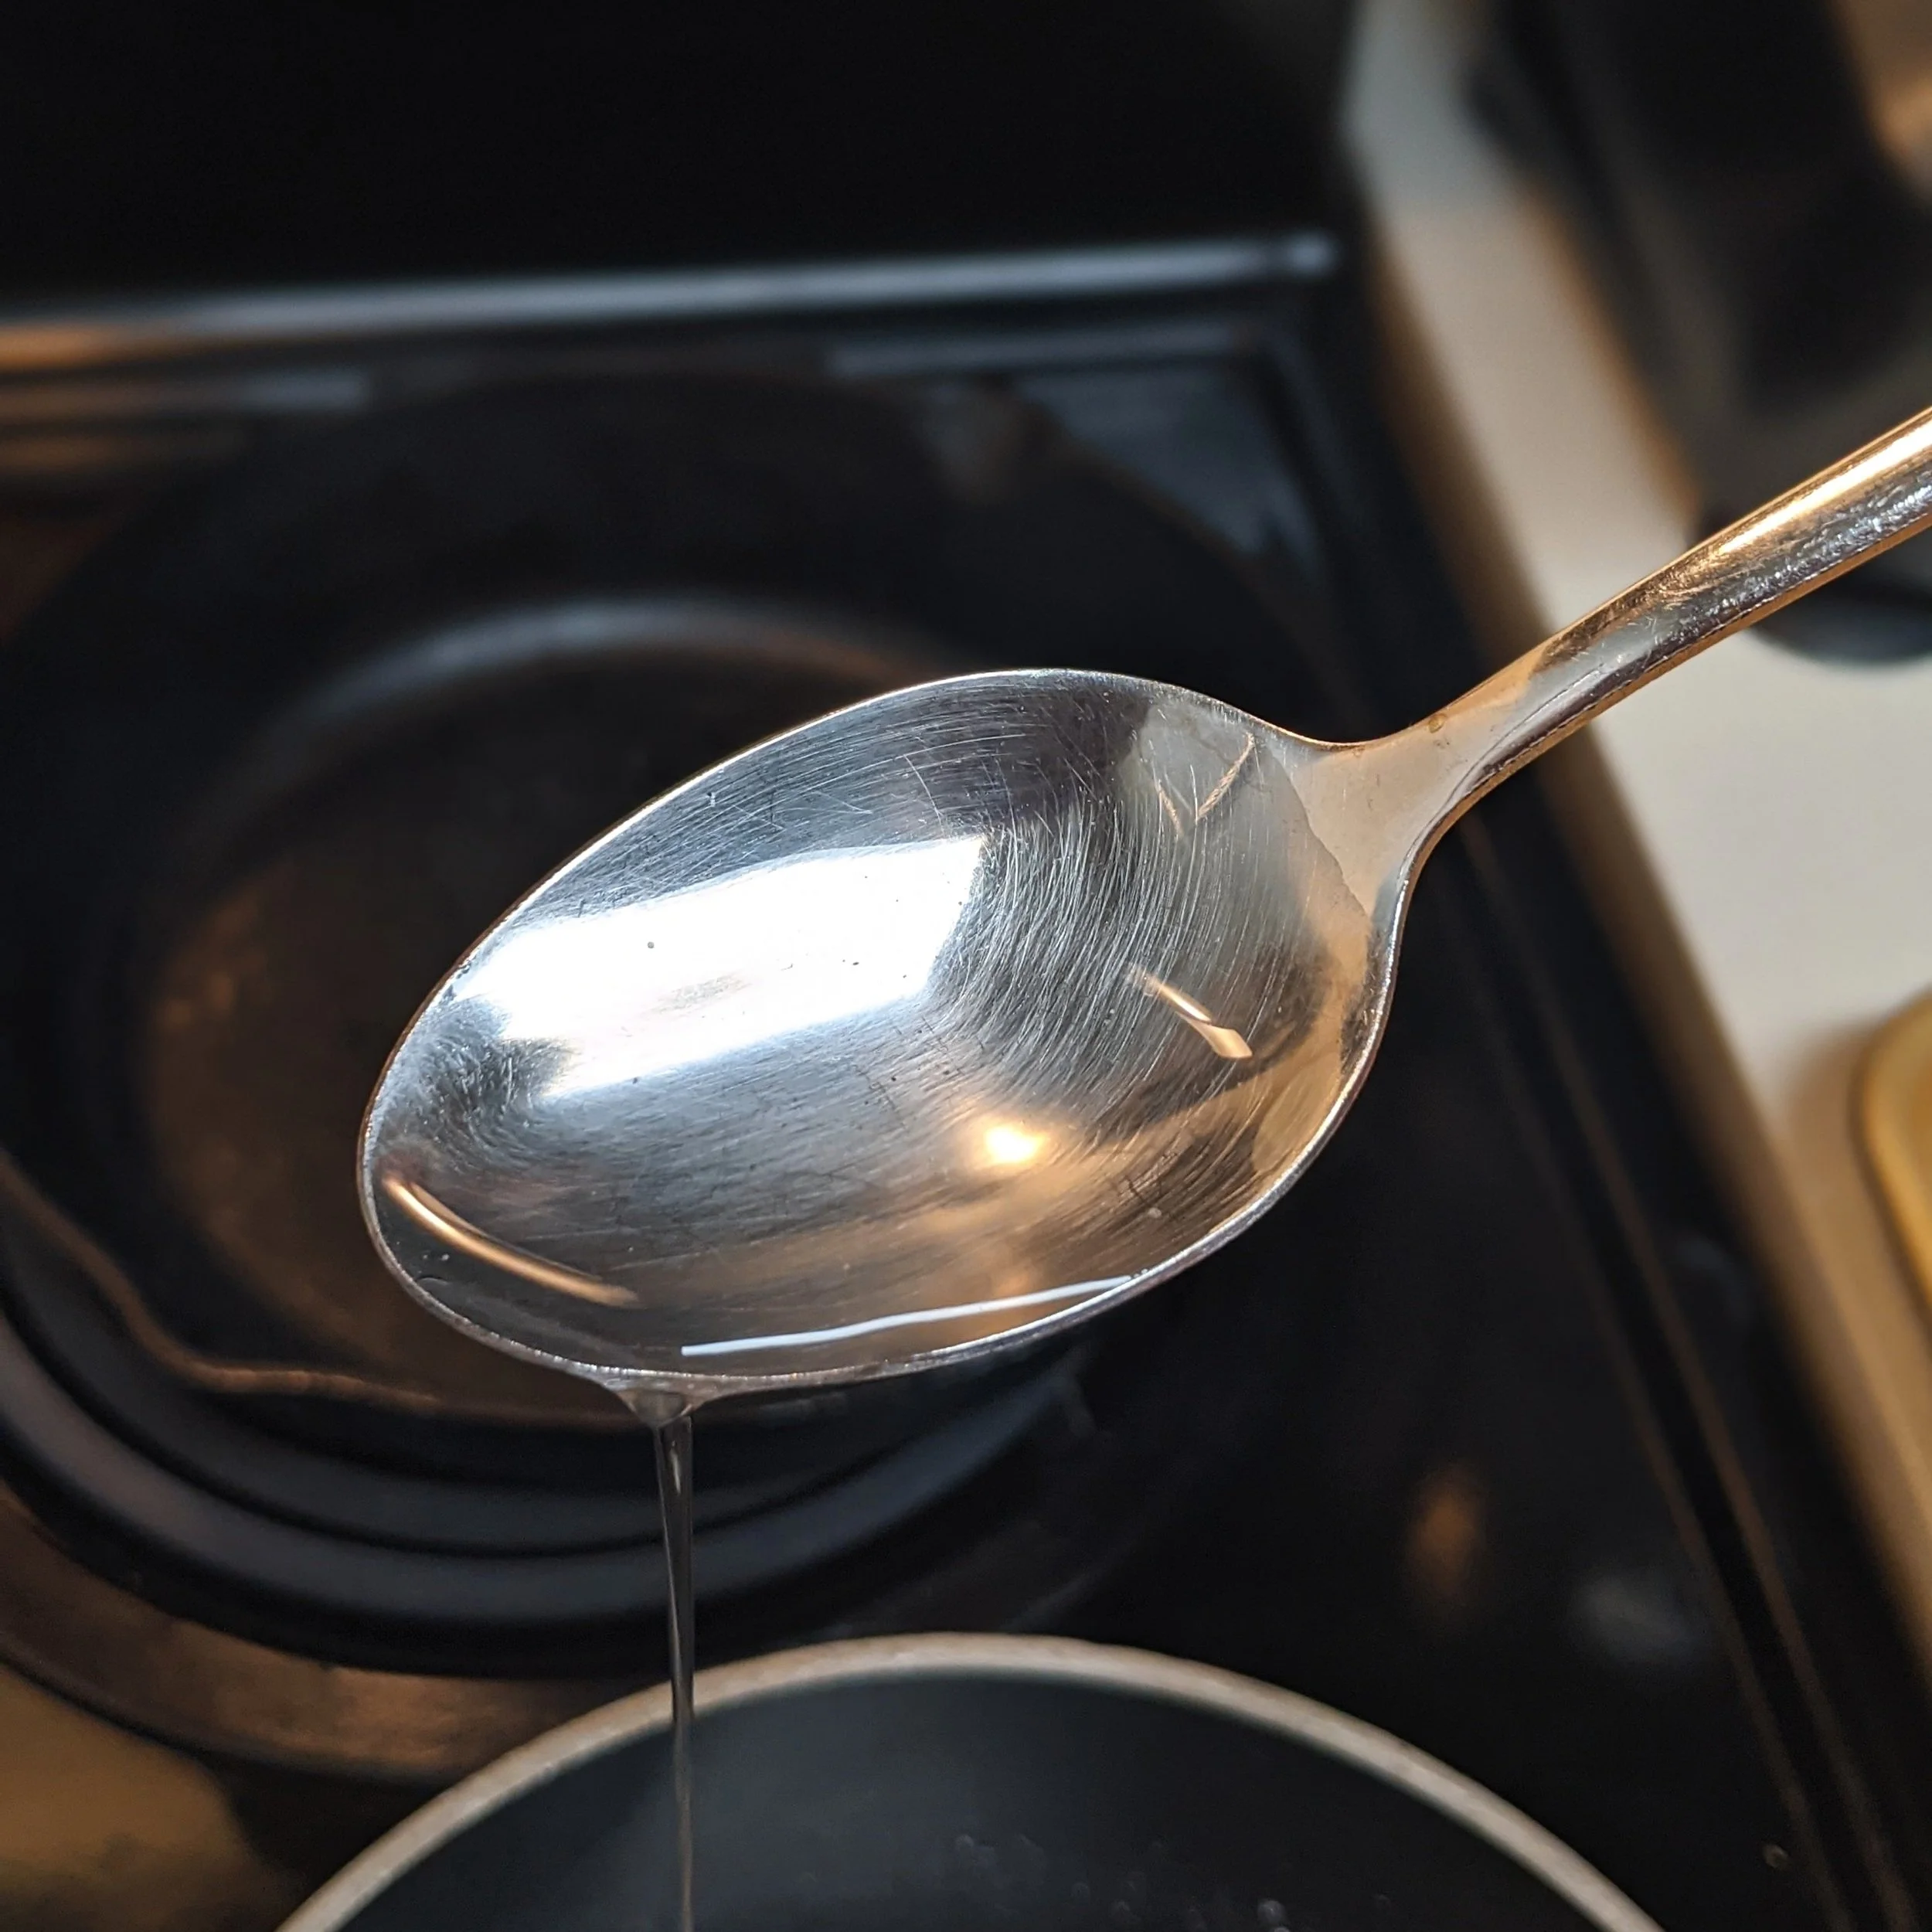
If your set aside un-whipped ganache has stiffened up, microwave it for 5-10 seconds until liquid again.
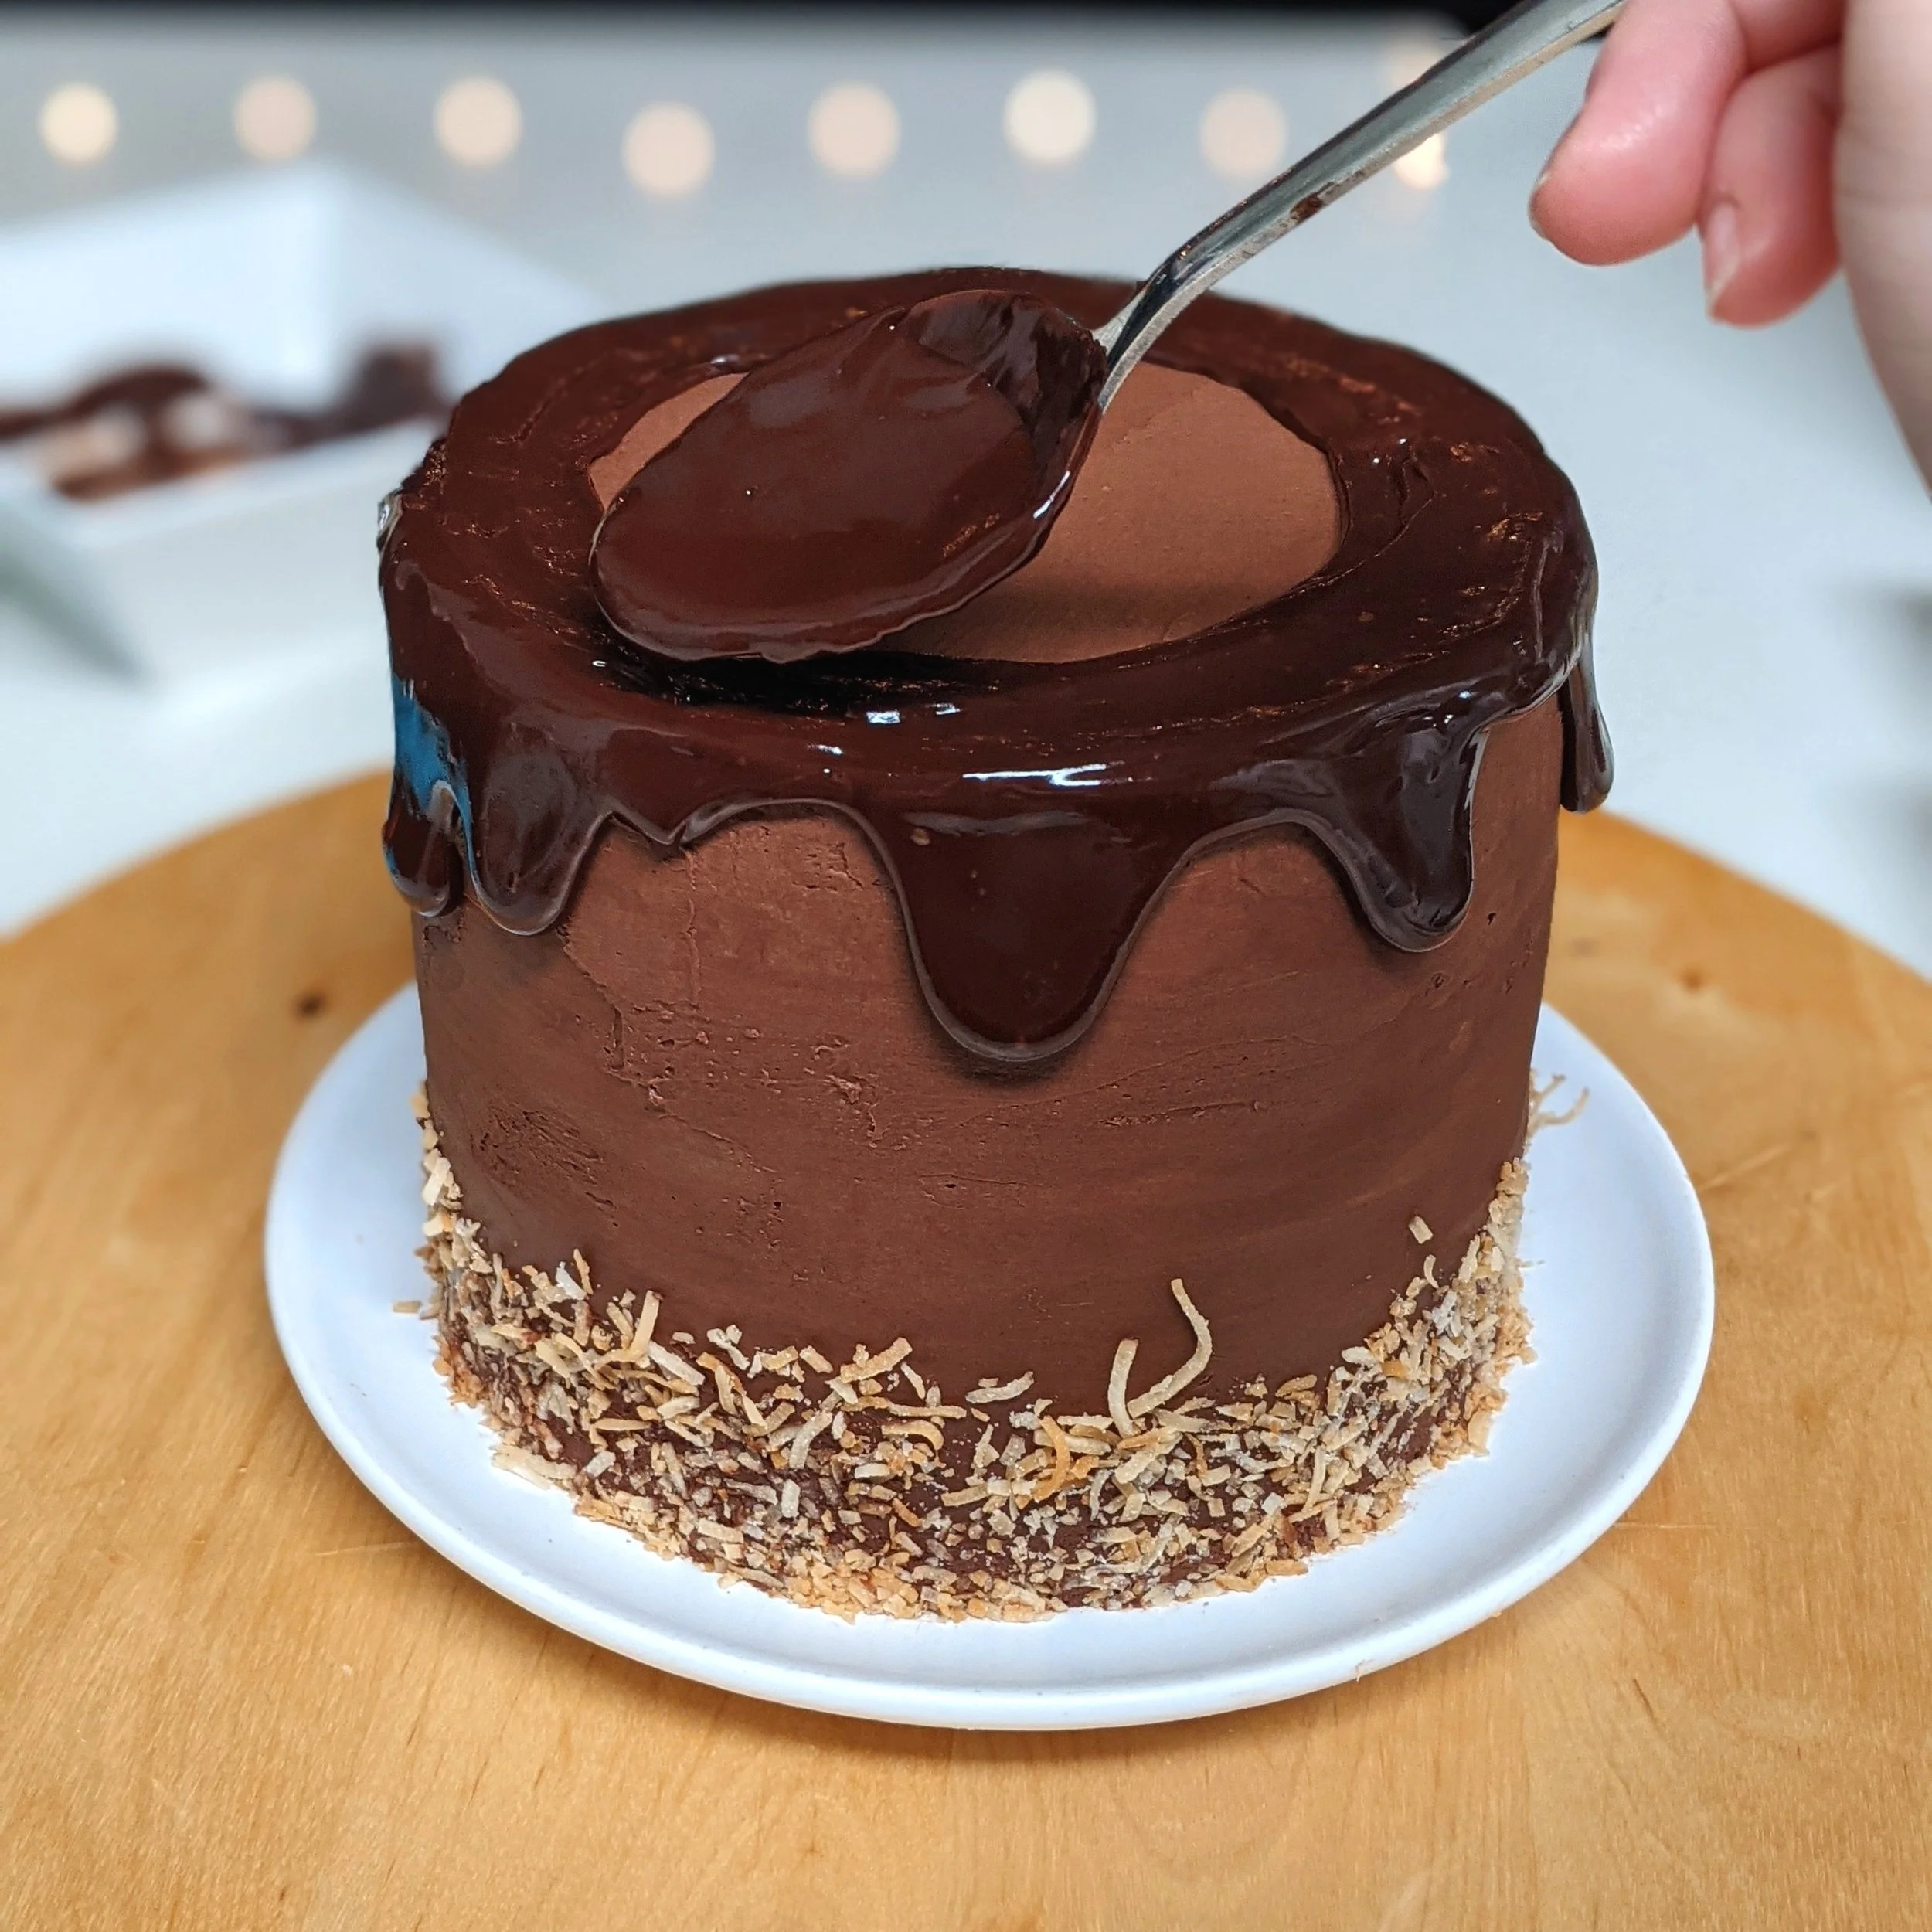
Remove your cake from the freezer. Drizzle your liquid ganache with a spoon around the edges of the cake to create a drip effect. If you want, you can also cover the whole top of the cake with it, but I like to just drizzle it around the edges.
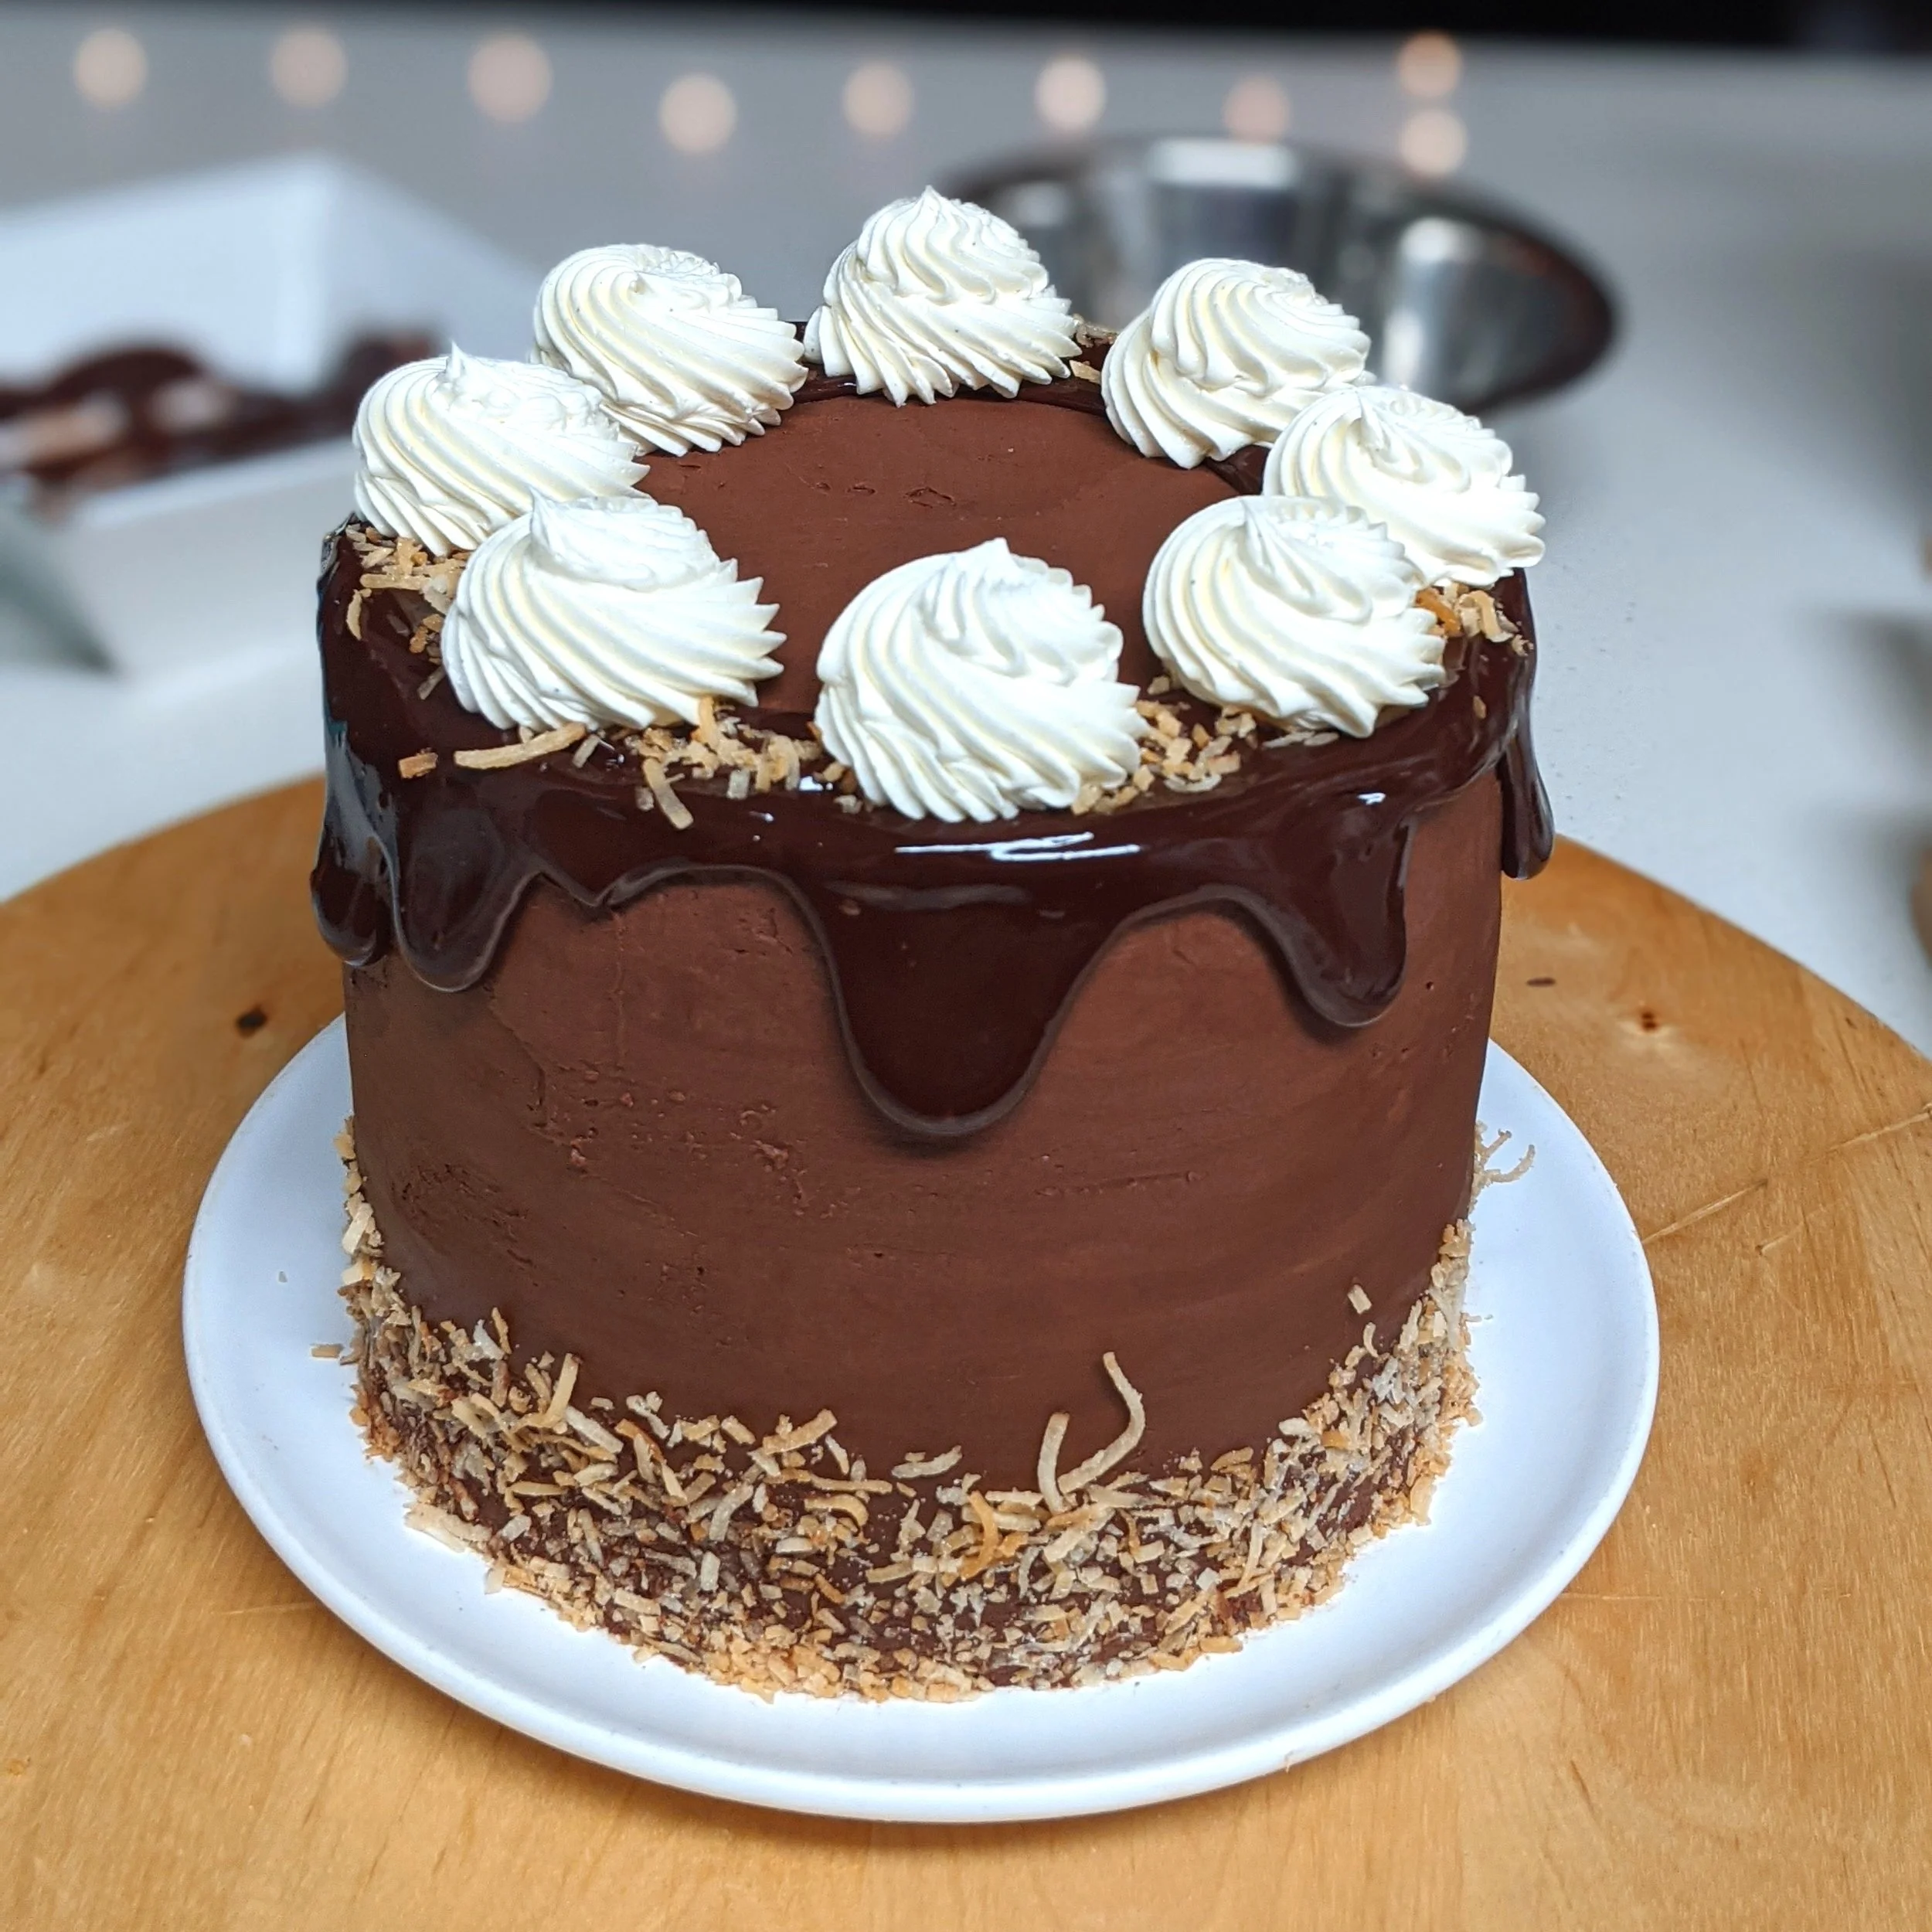
If desired, decorate the cake further with any leftover vanilla cream and toasted coconut. Slice and enjoy!
Toasted Coconut Fudge Layer Cake
Servings: 8 Time: 2 1/2 - 3 hours (active), 4 - 4 1/2 hours (including cooling times)
Difficulty: Medium
Ingredients
For Cake:
1 ½ cups all-purpose flour
¾ cup dark or black cocoa powder
1 ½ cups granulated sugar
1 ½ tsp. baking soda
¾ tsp. baking powder
1 tsp. salt
2 eggs
¾ cup sour cream
¾ cup hot coffee
3 TBS. melted coconut oil
1 tsp. coconut extract
1 cup shredded sweetened coconut (some of this will be used in filling and decoration)
For Sugar Syrup:
⅓ cup granulated sugar
⅓ cup water
¾ tsp. coconut extract
For Ganache:
16 oz. chopped dark chocolate
1 ¼ cups heavy cream
For Filling:
¾ cup softened salted butter
1 ½ cups powdered sugar
1 ½ tsp. vanilla extract or vanilla bean paste
2 TBS. heavy cream
Directions
Step 1: Toast Coconut
Preheat oven to 350 degrees fahrenheit. Spread sweetened shredded coconut on a sheet pan in an even layer. Toast coconut in preheated oven for 2 minutes. Remove and stir. Toast for another 2 minutes, then remove from oven. You should be seeing three colors of coconut - golden brown, light golden, and cream. If you’re not yet seeing golden brown, stir again and let toast one more minute. Once proper levels of toastiness are achieved, remove the coconut from the pan and set it aside. Leave the oven on for the cake.
Step 2: Make Sugar Syrup
In a small saucepan, combine granulated sugar, water, and coconut extract. Place over medium heat and bring to a boil, stirring occasionally to dissolve sugar. Once boiling, decrease heat to low and simmer for 5-10 minutes until slightly thickened to a thin syrup. Pour into a heat-proof container and refrigerate until ready to use.
Step 3: Bake Cake
Butter the inner sides and the edges of the bottoms of either 2 8-inch cake pans or 3 6-inch cake pans. Dust the buttered areas with a thin coating of cocoa powder. Turn pans upside down and tap firmly on the bottom to knock off excess cocoa. Line the bottoms of the cake pans with circles of parchment paper and set them aside.
Into a large mixing bowl, sift all-purpose flour, cocoa powder, granulated sugar, baking soda, baking powder, and salt. To the dry ingredients, add eggs, sour cream, melted coconut oil, and coconut extract. Beat on medium speed with an electric mixer until smooth, 1 or 2 minutes. Add hot coffee. Beat until smooth again. Fold in ⅓ cup of the toasted coconut.
Pour batter evenly into prepared pans. For 6-inch cakes, bake for 20-30 minutes. For 8-inch cakes, bake for 30-40 minutes. Finished cakes should spring back when gently touched, and a toothpick inserted into the center will come out clean or with a few moist crumbs on it.
Tip cakes out of pans, peel off parchment, and leave to cool right-side up on cooling racks until room temperature.
Step 4: Make Ganache
Pour the heavy cream into a small saucepan. Place over medium heat. When cream starts to steam and just bubble around the edges slightly, remove from heat. Add chopped dark chocolate. Whisk until chocolate is fully melted. Set aside ⅓ cup of the ganache to use later. Place remaining ganache in refrigerator for 30 minutes. It should be cool but still soft after that time. Transfer cooled ganache to a large mixing bowl and beat on medium speed for 5 minutes until very light and fluffy.
Step 5: Make Cream Filling
Place all filling ingredients into a medium mixing bowl. Beat with an electric mixer on medium speed for 10 minutes until very light and fluffy.
Step 6: Build Cake
Use a long, serrated bread knife to trim the domed tops from the cakes and make them flat and even. Save the tops for snacking or making cake pops!
Place the first layer of cake on a cake plate. If you have a rotating decorating stand, place the cake plate on that to decorate.
Brush the surface of the cake with sugar syrup using a pastry brush, or if you don’t have one, gently and evenly spoon the sugar syrup onto the surface of the cake.
Scoop some of the whipped ganache into a piping bag with the end cut off, or with a large round piping tip. Pipe a border of whipped ganache around the edge of the cake layer. Fill the border of whipped ganache with the vanilla cream. Sprinkle some toasted coconut over the vanilla cream filling.
Top with another layer of cake brushed with syrup. If you’re making a three layer cake, repeat the filling steps and top with the last cake layer, brushing it with syrup as well.
Coat the entire outside of the cake with a very thin layer of the whipped ganache, scraping it thin with a palette knife or scraper.
Place cake in the freezer for 15 minutes to harden the first coat of ganache (this is called the crumb coat, as it seals in loose crumbs from the cake). Once chilled, remove cake from freezer and coat with another layer of the whipped ganache.
Press toasted coconut onto the outside of the bottom third of the cake to decorate. Place cake in the freezer for another 15 minutes.
If your set aside un-whipped ganache has stiffened up, microwave it for 5-10 seconds until liquid again.
Remove your cake from the freezer. Drizzle your liquid ganache with a spoon around the edges of the cake to create a drip effect. If you want, you can also cover the whole top of the cake with it, but I like to just drizzle it around the edges.
If desired, decorate the cake further with any leftover vanilla cream and toasted coconut. Slice and enjoy!